
Fabreasy PDF Creator and SendReady manual
Everything about working with Fabreasy, in three versions that build on each other. Fabreasy PDF Creator: letterhead and continuation paper, creating PDFs from any program, signatures, security and e-mail texts per set. Fabreasy SendReady: preparing the e-mail from the document itself, with a fixed password per recipient, and digital signing. Fabreasy SendReady & Confirm: sending confidentially through the password portal, and agreement by e-mail. And managing your licence in the Fabreasy Portal.
Fabreasy SendReady & Confirm (agreement by e-mail and the password portal) is currently running as a closed pilot. Would you like to take part? Email pilot@fabreasy.com.
Contents
Getting started
Fabreasy PDF Creator
Fabreasy SendReady
Fabreasy SendReady & Confirm
Administration
Help
Glossary
Getting started
Getting started
Fabreasy PDF Creator turns any document into a PDF with your letterhead. This happens while the PDF is being made, automatically. Letterhead and continuation paper, front covers and terms and conditions, your signature or initial, a password and a digital signature: you set it up once, in a set. After that, all you choose when making a PDF is the set.
Do you want to change a PDF afterwards, for example arrange pages, edit text or place a signature? You do that in PDFixer, which is included with Fabreasy. You also make PDF/A in PDFixer.
Three versions
Fabreasy comes in three versions. Each version is an extension of the previous one: you keep everything you had and get something extra. You do not install anything extra for it; your licence determines what works.
| Fabreasy PDF Creator | Fabreasy SendReady | Fabreasy SendReady & Confirm | |
|---|---|---|---|
| What you get | PDFs with your letterhead, cover pages and terms, signature and initials, a password per set, merging and splitting | Everything in PDF Creator, plus: smart sending (a label such as TO:jan@example.com in the document prepares the email), a fixed password per recipient that you choose yourself, and digital signing with your certificate | Everything in SendReady, plus: sending confidentially (the recipient chooses their own password, in the password portal) and sending with approval (the recipient responds with a button in the document, and you see it in SendReady) |
| For whom | Per user | Per user | The whole licence: it applies to everyone with SendReady. Users with PDF Creator notice nothing of it |
| What you set up before it works | Your letterhead in a letterhead set; Get started in the Dashboard takes you through it | Nothing extra for the office. You put a label in your document. You enter a fixed password per address in SendReady; for digital signing you link your certificate to a set | Once for the office: accepting the data processing agreement and an organisation password, which you keep safe. Then per employee: entering that password once in SendReady, and for sending with approval the agreement address, permission to read the mailbox and the agreements folder |
Fabreasy SendReady & Confirm is currently a closed pilot. Would you like to take part? Email pilot@fabreasy.com.
The administrator of your licence sees which version you have in the Fabreasy Portal, on the Users tab. A higher version is added there under Add or renew. How SendReady and Confirm work is explained in Preparing documents for SendReady and Agreement by e-mail.
Installing
There are two installers: one for Fabreasy PDF Creator and one for Fabreasy SendReady. They put the same programs on the PC. You can also try SendReady later, via Get started in the Dashboard. Which version works is decided by your licence, not by the installer; see Three versions.
| Requirement | Explanation |
|---|---|
| Windows | 64-bit Windows 10 or Windows 11 |
| Rights | Administrator rights: right-click the installer and choose Run as administrator |
| .NET Framework | Version 4.8; if it is missing, the installer tells you |
| Word and Excel | Closed during installation; otherwise the installer asks whether it may close them |
The installer windows are in English. After installation the PC has:
- the programs, with Fabreasy Dashboard and Fabreasy Drag & drop in the Start menu;
- the printer Fabreasy PDF Creator (Printer), for everyone who works on the PC;
- the Fabreasy PDF Creator tab in Word and Excel.
When it is finished, the Dashboard opens. You do not need to restart.
The trial period
You can use Fabreasy free for 14 days, counted from the first use. The trial works without internet and without limitations. During the trial, the licence window appears at most once a day when you make a PDF; click Continue there. How to enter a licence afterwards is explained in Licence and workstations.
Your first PDF with letterhead
In seven steps you make a PDF with your own letterhead. For this you need your letterhead as a one-page PDF; in Word you make it with Save As and the file type PDF.
- Open PDF Letterhead sets in the Dashboard and click Default in the list. That is the set Fabreasy uses if you do not choose another one. After installation it has two layers with Fabreasy’s sample letterhead: one on First page only and one on Page 2 to end.
- Click the thumbnail of the layer on First page only. The Letterhead library opens. (If there are no layers, click + Add layer.)
- Click Add file…, choose your letterhead and click Use.
- If you have continuation paper, do the same for the layer on Page 2 to end. If not, remove that layer with ×.
- Open Drag & Drop in the Dashboard. Leave Use letterhead set at Default.
- Drag a Word document or a PDF onto the Folder box.
- The PDF is next to the original. A Word document becomes
<name>.pdf, a PDF becomes<name>_Output.pdf. Open it: every page has your letterhead.
You use the same set from any other program as well, with the printer Fabreasy PDF Creator (Printer), and in Word and Excel with the Fabreasy PDF Creator tab. See Creating PDFs. More about sets, such as front covers and terms and conditions, is in Letterhead sets.
Would you rather see how it works first? In the Dashboard, under Get started, choose the route My PDFs with letterhead: the tour shows it with a sample letter.
Does the PDF have no letterhead? See Troubleshooting, under “Check this first”.
The Dashboard
The Dashboard is the starting point. You open each program there with one click on a card. The cards are in four groups:
| Group | Cards |
|---|---|
| Create PDFs with letterhead and signature | Drag & Drop, PDF Printer driver, Office ribbon for Word & Excel |
| Edit | PDFixer with letterhead sets, Merge Word, Excel & PDF files, Split PDF files |
| Signatures | Create Transparent Signatures, Add Signatures |
| Management | Fabreasy SendReady, PDF Letterhead sets, Start Setup |
The cards for the printer and the ribbon are only an explanation: you choose the printer in the print window of any program, and you find the ribbon in Word and Excel themselves. You only see the ribbon card if Word or Excel is installed on the PC.
At the bottom are Tour… (three short screens about dragging, letterhead and signature), Help (opens this manual) and your licence details. With the Close when app starts tick box, the Dashboard closes as soon as you open a program.
Get started: choose what you want to achieve
At the top of the Dashboard is the Get started card. Choose what you want to do with Fabreasy; the card then shows the steps of that route.
| Route | Steps | What you can do afterwards |
|---|---|---|
| My PDFs with letterhead | Letterhead tour, signature tour, your own letterhead in a set | Every PDF automatically gets your letterhead, with a front cover or terms and conditions where you want them |
| Signature on my documents | Signature tour, making your own signature from a photo | Your signature automatically goes in the right place |
| Digital signature (certificate) | Tour without a certificate, your certificate in a set, your own letterhead in a set | Every document of that set goes out signed and with a timestamp |
| Smart sending | Smart sending tour; with Word and Outlook on the PC also the SendReady demo | Address, attachment and covering text come from the document itself |
| Sending confidentially | A password per recipient, the label in your own documents | Only the right recipient opens the PDF |
| Sending with approval | The trial run: you ask yourself for approval, the label in your own documents | The recipient approves a document, and you see that in SendReady |
Digital signature and Smart sending are part of Fabreasy SendReady; Sending confidentially and Sending with approval are part of Fabreasy SendReady & Confirm (see Three versions). If SendReady is not on your licence, the route offers the SendReady trial, a free SendReady seat on your licence, or a request to your administrator. You only see Sending with approval if that feature is on your licence. How to use SendReady is explained in Preparing documents for SendReady.
This is how the card works:
- The first step, Fabreasy is installed, is already ticked.
- A click on a step expands the explanation. Only the button in that explanation, such as Start the tour or Open Letterhead sets, opens the program. There, an explanation window points out the right field.
- The tick after a step only appears once it has worked, for example when your first PDF with a signature is ready. A route that is completely finished gets a ✓ before its name.
- With ‹ other goal you go back to the choice. If you choose a different route, it starts at the first step that is still open.
- If you do not have a certificate yet, No certificate yet? Continue for now puts that step aside and you continue with the next one.
In the tours you work with a sample letter of three pages. Fabreasy first asks whether it may put it on your desktop; if you choose No, it goes into the Documents folder. Afterwards you see the letter before and after, side by side.
You close the card with the cross. You bring it back with Getting started… at the bottom of the Dashboard.
Fabreasy PDF Creator
Letterhead sets
A letterhead set describes how your letterhead is placed under a document: which sheet goes on which page, which pages come before and after, and what else happens to the document. You make a set once. After that, when making a PDF, you only choose the set: in Drag & Drop, in the printer toolbar or in the ribbon in Word and Excel.
You can make as many sets as you like, for example one for invoices, one for quotations and one for reports.
The Letterhead sets screen
Open PDF Letterhead sets in the Dashboard. On the left is the list Your sets, on the right the structure of the selected set. Every change is saved straight away; Saved briefly appears at the top. There is no Save button.
If you do not have any set yet, you first see an explanation with two buttons:
- Create the demo set prepares a complete example: letterhead, continuation paper and an extra layer, with a front cover and general terms and conditions. Open the demo set to see how it is built.
- Create a set myself starts with an empty set.
You can find the explanation and the demo set again later via Explanation and demo set below the title.
Making a set
- Click + New set and give the set a name, for example your company name or “Quotation”.
- Click + Add layer and choose the sheet with your letterhead.
- Under Letterhead sits, choose whether the letterhead lies behind the content (default) or in front of it.
- Add front covers and back covers if needed.
Spaces and semicolons in a set name become a hyphen: “My Company” becomes “My-Company”. This is necessary because the name also appears in labels and commands. Two sets with the same name are not possible.
Layers: letterhead and continuation paper
A set has one or more paper layers, up to five. Each layer is a one-page PDF with a choice of which pages of the document it applies to:
| Choice | When |
|---|---|
| All pages | The same sheet under every page |
| First page only | Letterhead with logo and address |
| Page 2 to end | Continuation paper |
| Last page only | For example a sheet with space for signing |
| All pages except the last | |
| Odd pages, Even pages | Double-sided printing |
| Custom range… | For example 1-3,7 |
| Every nth page… | For example 2 |
| Off (do not apply) | Switch the layer off temporarily |
So letterhead and continuation paper are two layers. Fabreasy helps with this: the first layer you add is set to First page only, the second to Page 2 to end, and each one after that to All pages.
Layers lie on top of each other in the order of the list. You change that order with ▲ and ▼, and remove a layer with ×. Click the thumbnail to choose a different sheet, or drag a PDF onto the row. The magnifying glass shows the sheet at full size.
Front covers and back covers
A front cover comes before the document, a back cover after it, for example your general terms and conditions. A front cover or back cover may have more than one page. Add them with + Add front cover and + Add back cover.
Choosing a sheet: the library
When you choose a sheet, the Letterhead library opens. It contains all the PDF files Fabreasy knows. With Add file… you bring in a new sheet; with Use you put the selected sheet in the set. Fabreasy keeps a copy in the library, so the original may stay where it is.
When you add a sheet, Fabreasy checks it:
| Situation | What Fabreasy does |
|---|---|
| The PDF has more than one page | You choose which page is the letterhead; letterhead is always one page |
| The sheet has a white background that would cover the document | You choose Remove white rectangle (recommended) or Leave as is |
| The sheet is a full-page scan | Fabreasy asks whether you want to use it like that: a scan covers the layers beneath it |
| The sheet is larger than 1 MB | You choose Use as is (recommended) or Shrink and use |
| The sheet is larger than 7 MB, or so heavy that drawing it takes too long | Fabreasy refuses it; save the logo as an image (PNG at 600 dpi) and make a new PDF from it |
| The file is only online (OneDrive) | Fabreasy downloads it first; if that does not work, choose Always keep on this device in File Explorer |
| The PDF is protected or unreadable | Fabreasy cannot use the file |
You cannot remove a sheet from the library while a set still uses it. If a sheet comes from a shared folder, Fabreasy follows that source: a new version is taken over automatically. See Sharing sets and the company folder.
Removing a white area
Some PDFs have a white rectangle over the whole page. It covers the letterhead when the letterhead lies behind the content. With the tick box Remove a white area in the document so the letterhead shows through, Fabreasy removes that area. The tick box only works when the letterhead lies behind the content.
The “Default” set
Default is always at the top of the list. Drag & Drop, the printer and the processing fall back on it when no other set has been chosen. Adjust it like any other set; the name stays.
Duplicating, renaming and deleting
- Duplicate makes “… copy” with the same layers, covers, placement, white area and advanced options. You set up the e-mail message and digital signing again for the copy.
- Rename puts the cursor in the name field; the new name applies after Enter or as soon as you leave the field.
- Delete asks for confirmation first. The PDF files in the library remain.
If you use a set name in labels in your documents (SendReady), change those too when you rename the set.
The rest of the set
Below the covers there are three more blocks:
| Block | What for | More |
|---|---|---|
| E-mail message | Its own covering text for documents from this set | E-mail texts |
| Digital signing | Sign every document from this set with your certificate | Digital signing |
| Advanced options | File name suffix, password and permissions | below and in Security per set |
File name suffix
When you drag a PDF onto Drag & Drop, the result gets the name of the original with a suffix: quotation_Output.pdf. You set the suffix per set under Advanced options. With %date-time% the file gets the date and time, for example quotation_20261112-143005.pdf; any text around it is then dropped. If a file with that name already exists, it is overwritten. A Word or Excel file simply gets the same name with .pdf.
Trying it out
In Letterhead sets you see each sheet separately. If you want to see a whole document with the set, drag a letter onto Drag & Drop, or follow the route My PDFs with letterhead in the Dashboard: there you work with a sample letter of three pages.
Fabreasy PDF Creator
Creating PDFs
You make a PDF in three ways: by dragging (Drag & Drop), by printing to the Fabreasy printer, or with the ribbon in Word and Excel. In all three you choose a letterhead set and, if you like, a signature set, and in all three you choose what happens to the PDF.
The four buttons: what happens to the PDF
Drag & Drop, the printer toolbar and the ribbon have the same four buttons:
| Button | What happens |
|---|---|
| Folder | The PDF is saved |
| The PDF goes as an attachment into a new e-mail in your e-mail program | |
| Printer | The PDF is printed on the printer you choose in Setup |
| Magic Wand | Save, e-mail and print at the same time, as you set in Setup under the After processing options (by default only save) |
Fabreasy does not open the PDF automatically after making it.
Drag & Drop
Open Drag & Drop in the Dashboard or the Start menu. Drag one or more files, or a whole folder, onto one of the four boxes. A folder also includes the files in its subfolders.
Above the boxes, choose:
- Use letterhead set: the set you want to use;
- Use signature set: for signatures (see Signatures);
- the button to switch letterhead on or off. If letterhead is off, you see a red line Letterhead is OFF with the link Switch back on.
At the bottom, a line tells you what happens with your choice, for example that the set goes under every page. In the drop-down lists you can type to search for a set. With the size button, or by right-clicking the window, you make the window small, medium or large.
Which files
| Type | Extensions | Needed |
|---|---|---|
| Word and text | .doc .docx .txt .rtf .odt | Microsoft Word |
| Excel | .xls .xlsx .xlsm .xlsb .csv .ods | Microsoft Excel |
| PowerPoint | .ppt .pptx | Microsoft PowerPoint |
| Image | .jpg .png .bmp .gif .tif .wmf .emf |
An image is centred on a page and reduced if it is larger than the page. Note: .jpeg and .tiff are not recognised; rename them to .jpg and .tif.
During and after dragging
The files are processed one by one. The status line shows how far Fabreasy has got; with Stop, Fabreasy finishes the current file and skips the rest. When everything is done, the line turns green. If you are working in another window in the meantime, you get a Windows notification.
With Report you see for each file whether it worked. If something goes wrong, the report opens automatically.
Where the PDF goes
With the Folder box, the PDF goes next to the original:
| You drag | Result |
|---|---|
| A Word, Excel or PowerPoint file or an image | The same name with .pdf, in the same folder. A PDF with that name is overwritten |
| A PDF | A new file with a suffix, by default <name>_Output.pdf. You set the suffix per set, see Letterhead sets |
If Use archive folder is switched on in Setup, a copy with the date and time also goes into the archive folder.
The printer
Print from any program and choose the printer Fabreasy PDF Creator (Printer). After printing, the printer toolbar appears: PDF File Created and What would you like me to do with it?
- Choose the letterhead set and, if you like, the signature set. Fabreasy remembers your choice for next time.
- Click one of the four buttons. With Folder you then choose where to save the PDF; the window starts in the folder from last time or in Documents.
The toolbar closes after your choice.
Printing without the toolbar. In Setup, switch on Use archive folder and choose a folder, and switch on Print without Fabreasy printer toolbar pop-up. Every print then goes to the archive folder as a PDF without any questions.
If a file is on OneDrive or Google Drive, it may sometimes not be reachable during processing. In that case, save it on the PC first.
The ribbon in Word and Excel
Word and Excel have the Fabreasy PDF Creator tab. The buttons show an icon; the explanation appears when you hold the mouse over them.
| Part | What it does |
|---|---|
| Folder, Email, Print, Magic Wand | The four buttons. With Folder you then choose where to save the PDF |
| Letterhead on/off | In colour = on, grey = off |
| Letterhead set | The set for this PDF; type part of the name and press Enter to search |
| Use signature set | The signature set, or none |
| Output range | Word: all pages or the current page. Excel: the entire workbook or the current sheet |
| Define sets | Opens Letterhead sets or Signatures |
| Refresh screen | Reloads the sets, for example after you have made a set or changed the language |
| Settings | Opens Setup |
If letterhead is off, or your licence expires soon, an Attention group appears on the right.
Important settings in Setup
Open Start Setup in the Dashboard. Setup saves every change straight away.
| Setting (Settings tab) | What it does |
|---|---|
| Language | Double-click a language. Then click Refresh screen in Word and Excel |
| Use archive folder | Every PDF also (or, for the printer, only) in a fixed folder |
| Print without Fabreasy printer toolbar pop-up | Only works together with the archive folder |
| Use email template | Covering text for the Email button, see E-mail texts |
| Select printing device | The printer for the Printer button |
| After processing direct save / start email / direct print | What the Magic Wand does |
| Convert document to PDF using: | How Word and Excel files are converted; in both cases Microsoft Office is needed |
| PDF quality: | Compact (e-mail), Standard or High quality |
| Remove white background under letterhead | The starting setting for new sets |
| Do not scan text in PDF for tags/signatures (faster) | Switches off the search for signature tags |
Labels in the document
With SendReady you put a line such as TO:jan@example.com in a document. Fabreasy takes that line out of the PDF and prepares an e-mail to that address, with the right set. Without SendReady, such a line stays ordinary text in the PDF. How labels work is explained in Preparing documents for SendReady.
Signature tags in the text do work without SendReady; see Signatures.
PDF/A
PDF Creator does not make PDF/A. Open the PDF in PDFixer and choose Save as PDF/A…. PDFixer then tells you which level the file has.
Fabreasy PDF Creator
Merging and splitting
Two small programs in the Dashboard, under Edit. Here too you choose a letterhead set and what happens to the result.
Merging
Merge Word, Excel & PDF files turns several files into one PDF.
- Drag files or folders onto the Drop files here box. Word, Excel and other files are first converted to PDF, just as with Drag & Drop.
- Put the files in the right order with ▲ and ▼; with ✕ you remove a file.
- Under Settings, choose the letterhead set, and under Simulate drop on what happens to the result: Folder, Email, Printer or Magic Wand.
- Under Output, choose the folder and the file name (by default
Output.pdf). - Click Start merging process.
Afterwards you can open the output folder, or open the result straight away in PDFixer to arrange pages or change something.
Do you often use the same files, for example general terms and conditions? Double-click a file name to add it to your favourites. With the Favorites tick box you see them on the right; double-click to add one.
Splitting
Split PDF files cuts a PDF into parts. Splitting only works with PDF files.
- Under Settings, choose how to split:
- after every so many pages: for example a new file every 3 pages;
- or only take out certain pages, with a range such as
1,4-5,10.
- Choose the letterhead set, and under Simulate drop on what happens to each part.
- Set the file names: each part is called
<name>_<text><number>.pdf, with the text and the starting number you enter. - Under Output, choose the folder.
- Drag the PDF onto the box. Splitting starts straight away; there is no start button.
Each part goes through the processing separately. So if you choose Email, you get one e-mail per part: splitting 100 pages into 100 parts gives 100 e-mails.
Fabreasy PDF Creator
Signatures
Fabreasy places your signature or initial on the document as an image, while the PDF is being made. You make the image once from a photo, and decide once where it goes.
A signature image is something different from digital signing with a certificate. That is covered in Digital signing. You can also use the two together.
Making your signature from a photo
Open Create Transparent Signatures in the Dashboard. The program works in four steps.
- Open photo. Write your signature with a dark pen on white paper. Choose Take photo with webcam, or Select photo if you have taken a photo with your phone (best quality). If the webcam does not work, the Windows Camera app opens; the photo is then loaded automatically.
- Crop. Drag a frame around the signature with the mouse and click Crop. If the photo needs to be rotated or mirrored first, do that before cropping.
- Clean up. Drag the slider until the background has gone and the signature looks sharp. Everything lighter than the ink becomes transparent. With Line weight: you make thin lines thicker; with Signature color you choose a colour.
- Save. Click Save / Close and choose a name. The signature becomes a PNG file with a transparent background.
You make an initial the same way: a second photo with just your initials.
The signature then appears in Your signatures in the Signatures program. Fabreasy remembers where the file is and does not make a copy. If you move or delete the file, it shows file is missing!. So keep your signatures in a fixed place.
Do you already have an image? Add it with Add an image… in Choose a signature. Preferably use a PNG with a transparent background; a JPG always has a white background, which may be visible on your letterhead.
Three ways to place a signature
Open Add Signatures in the Dashboard. You see three cards:
| Way | How it works | Suitable for |
|---|---|---|
| Fixed positions | A signature in a fixed position on the page, with a page choice | An initial at the bottom right of every page, a signature on the last |
| Automatic signing | If a certain text is in the document, the signature goes there | Your signature above your name below the closing |
| Signature tags | A short code in the document; the signature goes there | An initial or signature exactly where you put it in the document |
Every change is saved straight away.
Fixed positions
Click the Fixed positions card. If you do not have any yet, Create the example set makes a working example for you: an initial at the bottom right of all pages and a signature on the last page, with your own signature if you already have one.
To make one yourself:
- Click + New fixed position and give it a name, for example “Initial bottom right”.
- Click + Add signature and choose the signature.
- Under On which pages?, make the same kind of choice as for letterhead: all pages, only the first, only the last, a custom range and so on.
- Drag the signature to the right place on the page and pull a corner to set the size. With the arrow keys you move it into exactly the right position. With Choose a document… you see it on your own document.
- Click Save.
A fixed position can contain more than one signature. The size is a percentage of the page width; on a different page size it scales along.
Automatic signing
A rule says: if this text is in the document, add this signature.
- Click the Automatic signing card and then + New rule.
- Under If this text appears in the document, enter the text, for example your name.
- Under then place this signature, choose the signature.
- Drag the signature on the preview to the right place relative to the yellow text, or under Or set it exactly: enter the distance in millimetres and the size.
Note:
- Capitals count: “jansen” does not find “Jansen”. Part of a word is fine: “Jansen” also finds “M. Jansen”.
- The text must be on one line.
- Every place where the text appears gets a signature. If your name appears twice in the letter, the signature appears twice.
- Fabreasy searches the document itself, not the letterhead. Your name in the footer of the letterhead does not count.
- Fabreasy cannot search a scanned PDF without text.
At the bottom of the window you can apply rules to PDFs that already exist, individual files or a whole folder. With Check first you see what would happen without anything changing; Process places the signatures.
Signature tags
With a tag you decide in the document itself where a signature goes. Tags work in every program, not just in Word.
- Click the Signature tags card and + Add a tag.
- Give the tag a name, for example
Jan, and choose the signature with Signature…. - In your document, at the place of the signature, put the code
>#>Jan-25%. With Copy you put an example on the clipboard.
The number determines how large the signature becomes: the higher, the larger. Each place may have a different number. The signature is centred on the code; Fabreasy removes the code itself from the PDF. If you put the code in white or in a very small font, it does not stand out in your own document.
Note:
- The code must not contain spaces. A tag name must not contain a space,
-,%,;,<or>. - Fabreasy only searches for tags once you have created at least one.
- An unknown or misspelt tag stays in the PDF as text. Check first in Automatic signing reports this.
The easiest way to put an initial on every page is a fixed position on All pages. If you want to decide per page where it goes, use a tag on each page.
Signature sets: which ones take part?
At the top of the Signatures window is Signature set:. A signature set is a named choice: you tick which fixed positions, rules and tags take part. When making a PDF, you then only choose the signature set.
- + New set starts empty: tick what should be in it. A new fixed position, rule or tag is not yet in any set; tick it in the set it should take part in.
- All signatures has everything switched on and cannot be changed. Use it to test whether a rule or tag works.
- Choosing no set means: tags only. Fixed positions and rules then do not take part.
- A tag that is switched off in the chosen set is not placed. The code then stays in the PDF, so that you can see why.
Below each card you see how many are in the chosen set, for example “Signing rules: 1 of 3 in this set”. Click the box in front of a rule to put it in or take it out of the set. Next to the set you see in which route it has been chosen, or not chosen anywhere yet.
Choosing a signature set when making a PDF
| Where | How |
|---|---|
| Drag & Drop | Use signature set: next to the letterhead set |
| Printer toolbar | The same drop-down list, after printing |
| Ribbon in Word and Excel | Use signature set on the Fabreasy PDF Creator tab |
| Label in the document (SendReady) | The fourth part of the label: TO:address:letterheadset:signatureset |
Each place remembers its own choice. A label in the document takes priority over the choice in Drag & Drop, the toolbar or the ribbon. Below the choice in Drag & Drop and the toolbar you see what takes part, for example “1 fixed, 2 rules, 1 tags”.
If you do not have a signature set of your own yet, Drag & Drop shows Create example set… in the list.
Fabreasy PDF Creator
Security per set
A set can protect every document with a password and decide what the recipient may do with the PDF. You set this up under Advanced options, at the bottom of the set in Letterhead sets. Click ▸ Advanced options to open the block.
Setting it up
- Tick Protect the document (password and permissions).
- If you like, enter a Password to open, and again under Repeat the password.
- Enter a Password to change the restrictions.
- Under What the recipient may do:, tick what is allowed.
| Permission | What the recipient can do |
|---|---|
| Print the document, also in high quality | |
| Copy text | Select and copy text |
| Comments, highlights and signing | Add annotations and use form fields for a signature |
| Edit content | Change the content |
| Fill in form fields | Fill in a form |
| Arrange pages | Add, rotate or delete pages |
| Copy content for accessibility | Let screen-reading software work |
Everything is saved straight away. The open password only once both fields are the same; if they are not, you see an orange message and nothing has been saved yet. Capitals count.
By default, protection is off and everything is allowed. If you untick the box, the fields stay visible but greyed out; if you tick it again, they apply again.
With or without an open password
- With an open password: only someone who knows the password can open the document.
- Without an open password: anyone can read the document. Only the restrictions are protected, with the second password.
Fabreasy encrypts protected PDFs with AES-256. Every common PDF reader opens them.
Do you want a separate password for each recipient, for example for each customer? SendReady does that: see Preparing documents for SendReady.
If the password is missing
Passwords are never included when you share a set or export your settings. So on the other PC the password has to be entered again. Until then, Fabreasy makes no document with that set and says which set needs a password. That way a document that should be protected never goes out unprotected.
Protection and PDF/A
A protected document cannot be PDF/A. If you need PDF/A, leave the set unprotected, open the PDF in PDFixer and choose Save as PDF/A….
Fabreasy PDF Creator
E-mail texts
If you choose the Email button when making a PDF, Fabreasy puts the PDF as an attachment in a new e-mail. With an e-mail template, a covering text and a subject are filled in straight away. You can use a general template, and a template of its own for each letterhead set.
The general template
In Setup, on the Settings tab, tick Use email template. With Adjust e-mail you change the text. This template applies to every e-mail Fabreasy prepares, unless the set has a template of its own.
A text of its own for each set
- Open Letterhead sets and choose the set.
- Under E-mail message, tick Use its own e-mail message for this set, or click Edit e-mail message….
- Write the text and click Save. The tick box is then switched on automatically.
In the box below the tick box you see the first lines as they will appear in the e-mail. A click on that box opens the text.
That way an invoice gets a different covering text from a quotation, without you having to think about it when sending.
The editor
| Part | What it does |
|---|---|
| Copy text from: | Take over the text of another set or of the default template (only if there are other templates) |
| Your email message and parameters | This is where you write the template |
| Reset template | Puts the default template for your language back in the box; only Save stores it |
| Review model | Shows what the e-mail looks like |
| Save, Cancel | Store or not. If you close with changes, Fabreasy asks whether you want to discard them |
What you can put in a template
The default template is also an example: it explains in comment lines what is possible.
| In the template | In the e-mail |
|---|---|
A line starting with // | Nothing: this is a comment |
SUBJECT: invoice :MONTH-0: | The subject. Always use the English word SUBJECT: |
:DATE: | Today’s date |
:DATE+14: or :DATE-1: | A date so many days later or earlier |
:TIME: | The time |
:MONTH-0: or :MONTH+1: | The name of this month, or a month later or earlier |
:ATTACHMENT: | The file name of the PDF |
:BR: in the middle of a line | A new line |
| An empty line | An empty line |
The keywords work in capitals and lower case. They also work in Dutch (for example :DATUM: and :BIJLAGE:) and in the language of your Fabreasy.
The salutation from the letter (SendReady)
With SendReady, the salutation of the e-mail can come from the letter. In the letter, put the code <-< after the salutation, for example “Dear Kees, <-<“. In the template, put the tag #SALUTATION# where the salutation should go. If there is no <-< in the letter, the tag becomes the ordinary greeting “Hello,”. Without SendReady, <-< does not work and the code stays ordinary text in the letter.
Which template applies
- The general template, if Use email template is switched on in Setup.
- The set’s template takes priority over that, if the tick box for the set is switched on.
- With SendReady, a template with the name of the label in the letter always takes priority.
Fabreasy SendReady
Preparing documents for SendReady
In short
You type a few short labels in your Word, Excel or PDF document, for example TO:john@company.example. When you print the document to Fabreasy or drag it onto Fabreasy, SendReady reads those labels. It puts the right letterhead underneath, protects the PDF with the recipient’s password and prepares the e-mail with address and salutation in Outlook. The labels themselves disappear from the PDF; the recipient never sees them.
Fabreasy SendReady is an extension of PDF Creator, and Fabreasy SendReady & Confirm an extension of SendReady. What each version does, and what you set up before it works, is in Three versions.
The labels: what goes where?
Put the labels on the first page, each on a line of its own. Only the signature tag may be on every page.
| Label | Example | What it does | Stays in the PDF? |
|---|---|---|---|
TO: | TO:john@company.example | The recipient. The e-mail is prepared with this address. The password for this address goes on the PDF. | No |
TO: with set | TO:john@company.example:Default | Same, plus the letterhead set. That set also chooses the text of the outgoing e-mail. | No |
TO: with signature set | TO:john@company.example:Default:Board | Same, plus the signature set that is applied. Without a letterhead set: TO:john@company.example::Board | No |
CC: | CC:peter@company.example | Copy recipient in the e-mail. | Yes, a copy recipient may see the recipient |
BCC: | BCC:archive@office.example | Blind copy recipient. | No, not to be found in the end result |
<-< | Dear John, <-< | The salutation. It also appears at the top of the e-mail. | The salutation does, <-< does not |
TO: with :confirm | TO:john@company.example:Standard:confirm | Asks for agreement on this document. :confirm always goes last; capitals do not matter. SendReady and the ribbon add it with Ask for approval. | No |
CONFIRM: | CONFIRM:yes | Asks for agreement on this one document, just like :confirm. CONFIRM:no switches it off and always takes precedence. | No |
>#> | >#>John-25% | Position and size of a signature. “John” is a tag from signature management, 25% the size. | No, the signature takes its place |
Good to know:
- One address per label. More recipients? Put several
TO:lines one below the other. The same applies toCC:andBCC:. - Capitals hardly ever matter. At the start of a line,
To:works just likeTO:. In the middle of a line, only in capitals. - A line of its own. If the line starts with the label, the whole line disappears from the PDF. So do not type ordinary text after it.
- No white text needed. The labels are really removed from the PDF, not covered up.
- Set names must exist exactly and may not contain a space. An unknown name changes nothing.
- Buttons for agreement are only added when you ask for them: with
:confirmafter the label, withCONFIRM:yes, or with a letterhead set the administrator has ticked for it (SendReady, Confirmations, Settings…). There is no default for every document, so an invoice or newsletter never gets buttons unasked.CONFIRM:noalways takes precedence. The document needs a password, and an agreement address must be set.
What it gives you
- Less manual work. No saving the PDF separately, no looking up a password, no retyping an address. Print once and the e-mail is ready.
- No wrong recipient. The address is in the document itself, so it belongs to the letter and is not a guess in the address book.
- Always protected. The PDF automatically gets the password that belongs to that address (AES-256). It cannot be forgotten.
- Always the right letterhead. The set in the label chooses letterhead, signature and e-mail text in one go.
- Overview. With agreement by e-mail you see for each document whether the customer agrees, with a response that could only come from someone who opened the document with the password. No more phoning to chase.
Next: what happens when you print
- You print the document to the Fabreasy printer, or drag it onto Fabreasy.
- SendReady reads the labels on the first page.
- The letterhead and the signature are added. They come from the set in the label, otherwise from your default choice.
- The labels are removed from the PDF.
- If you request agreement, a page with three buttons is added at the end, and SendReady records the document sent in your office’s agreements folder.
- The PDF is protected with the password that belongs to the
TO:address. That password is stored in SendReady with that address, or the customer chose it themselves via the password page. - Outlook opens a new e-mail. The recipients, the subject, the salutation and the text from the e-mail template are already filled in. The PDF is attached.
- If the document has buttons, the text contains a line saying that the customer can respond with the buttons on the last page. If the customer is registered for the password page, there is also a line “Forgot the password of the attachment?”.
- You check the e-mail and press Send.
After that you follow in SendReady under Confirmations what the customer does: with Read mailboxes SendReady fetches the responses from your mailbox. There you can also prepare a reminder or mark a document sent as lapsed. If you later send a new version of the same document, the old one gets the status “Replaced by a newer version”. Colleagues with the same agreements folder see the same overview. Everything about this is on the page Agreement by e-mail.
What the recipient sees and does
The recipient gets an ordinary e-mail from you, with your text, the salutation and the PDF as an attachment. Nothing of the labels can be seen.
Once: choosing their own password. If you invite the customer to the password page, the customer receives an e-mail with a link (valid for 7 days). There the customer chooses a password of at least 8 characters, with an optional hint. Fabreasy cannot read it and SendReady does not show it; your office’s computers only use it to protect the PDF. From then on, all your documents open with that password. Forgotten? Via the link below your e-mail the customer chooses a new password.
With every document: opening the PDF. The customer opens the attachment with their own password, in any ordinary PDF reader.
With every document: letting you know what they think of it. If you request agreement, there are three buttons on the last page of the PDF:
| Button | When |
|---|---|
| Agree | Everything is correct. |
| Not yet agreed | Something still needs to change. The customer writes what in the e-mail. |
| Do not proceed | The customer does not want to go ahead with this. |
A click opens a ready-made message to your office in the customer’s e-mail program, with the document name, the reference and a code that is only in the opened document. The customer sends it themselves, from their own mailbox; no website opens. If the customer wants to give a remark that only your office can read, they open the document on the agreement page, whose address is on the same page: there the remark is encrypted in their own browser, and the customer sends it with their own e-mail program too. If the customer changes their mind, a new response simply follows; the newest counts.
Nothing more is expected. No account, no app and no signature is needed. It is a working arrangement with you, not a signature or formal approval.
What it gives the recipient
- Their own password, once. The customer chooses it and does not have to request or look up a password for each document. No more passwords in a separate e-mail or text message.
- Secure without hassle. Personal and financial documents are protected. Yet everything works with an ordinary e-mail and an ordinary PDF reader.
- Recognisable. Every document comes on your company stationery, with a salutation by name.
- Quick to respond. Agreeing takes a click on the button and a click on Send, without a phone call or signature on paper.
- Clarity. The customer sees which document it concerns, and keeps a copy of the response in their own Sent Items folder. A response can still be changed later with a new one.
- In control. Forgot the password? The customer resets it themselves, without waiting for you.
Tips and common mistakes
- Let the ribbon do the work. In Word, choose the address, the set and the signature set in the SendReady ribbon. The ribbon puts the label in the document for you, including
CC:andBCC:. With Ask for approval,:confirmis added after the label. - Create a Word template with the labels in it, for example the salutation with
<-<. Then you only fill in the address for each letter. - No password on the PDF? Then the address is not in SendReady or has no password. Add it, or send the customer the invitation to the password page.
- Different letterhead than intended? Check the set name after the address: spelled exactly, without a space.
- Signature stays as
>#>John-25%? Then the tag does not exist, the percentage is missing, or the tag is not in the chosen signature set. - Text disappeared? There was text after a label on the same line. Always put labels on a line of their own.
- Two recipients? Two
TO:lines, not two addresses after one label. - No request for agreement needed, for example for a newsletter? Put
CONFIRM:noin the document, or remove the tick for that letterhead set (Confirmations, Settings…). - No buttons although you requested agreement? Then the document had no password, or no agreement address has been set yet. SendReady reports this when sending.
Fabreasy SendReady
Digital signing
Digital signing uses your certificate to put a cryptographic signature and a timestamp in the PDF. In the PDF reader, the recipient sees who signed the document and when, and whether it has been changed since. That is something different from a signature image: an image does not protect the document.
You set it up in a letterhead set. After that, every document from that set is signed, whichever route you use to make it: Drag & Drop, the printer, the ribbon or a SendReady label.
What you need
| Needed | Explanation |
|---|---|
| SendReady on your licence | Digital signing is a Fabreasy SendReady feature. Without SendReady, Fabreasy explains how you can try it |
| A certificate on a smart card or USB token | With a PIN, from an issuer of certificates for signing documents |
| The issuer’s software | Installed on the PC; Fabreasy talks to the card or token through that software |
| Internet | For the timestamp |
Fabreasy recognises the software of Certum, SafeNet, A-Trust and OpenSC, among others. If you use a certificate from the Windows certificate store, you can sign in PDFixer.
Want to see how it works first? Follow the route Digital signature (certificate) in the Dashboard. The tour shows in five screens what the recipient sees, even without a certificate.
Setting it up in a set
- Insert the card or token into the PC.
- Open Letterhead sets and choose the set.
- Tick Digitally sign documents from this set (with a certificate).
- Under Certificate, choose the certificate. If there is only one on the card, Fabreasy chooses it itself. If you see nothing, click Refresh.
- Fill in a Reason (optional) if you like. The recipient sees it in the PDF reader.
Fabreasy remembers the certificate itself, not the card. If the card is briefly not in the PC, your choice is kept.
Signing in use
Signing is the last step: first come letterhead, signatures and protection, then the digital signature. Fabreasy then asks for the PIN in a window of its own. The PIN goes to the card and is not stored anywhere.
| Route | PIN |
|---|---|
| Drag & Drop | Once per batch: all documents you drag in one go are then signed |
| Printer and ribbon | Once per document |
Fabreasy warns you when there are only a few attempts left before the card is blocked. If the card is blocked, you unblock it with the PUK code from your issuer.
Before the first processing, Drag & Drop checks whether the card is there and whether the set’s certificate is on it. Afterwards you see how many documents were signed.
No card in the PC
If the set signs, but Fabreasy finds no card or token, you get a choice:
- Search again: insert the card and try again;
- Continue without signing: the document is made, but not signed.
Timestamp
Every signature gets a timestamp from a timestamp server. This needs internet. If the server does not respond, the document is not signed and you get a message about it. Try again later.
What the recipient sees
The signature is invisible on the page. The recipient sees it in the signature panel or the bar of the PDF reader, with the name from the certificate. If you also want a visible signature, use a signature set as well (see Signatures): the image comes first, the signing last.
Signing and a password
If the set protects the document with a password (see Security per set), Fabreasy protects first and signs afterwards. If a PDF already comes in with a password, Fabreasy cannot sign it; the document then goes out protected but without a signature.
A PDF that has already been signed
Fabreasy writes the signature as an addition to the file, so that a next signer can add a signature. Do not put a PDF that has already been digitally signed through Drag & Drop or the printer again: Fabreasy then makes a new PDF. You add a signature to a signed PDF in PDFixer.
Sharing with colleagues
If you share a set that signs, the certificate is not included. On your colleague’s PC, signing stays off until your colleague chooses a certificate of their own for the set.
Fabreasy SendReady
An office with several workstations
SendReady keeps track of everything per staff member, per Windows account. What the whole office shares runs along two routes: the customer addresses with their passwords via Fabreasy, and the customers’ responses via your own e-mail and a shared agreements folder.
What is shared and what is not
| Item | Shared with the office | Only with the staff member on that computer |
|---|---|---|
| Customer addresses and passwords | According to the address’s layer: department or whole organisation (see Departments in the Reference) | An address set to “Only me” |
| Customers’ responses | Every computer with the same agreements folder sees all documents sent with buttons and the responses to them, including those of colleagues | If the agreements folder is on the computer itself, only that computer sees them |
| Response e-mails | Arrive at the agreement address; every colleague sees a shared mailbox | A mailbox only you read |
| Confidential remark from the customer (via the agreement page) | Can be opened on every computer that has access to the agreements folder, with the key of that document sent | |
| Organisation key | One key for the whole office | Every staff member enters the organisation password once on every computer |
Adding a workstation
- Installing. Install Fabreasy and start it. The staff member registers automatically as long as there is a free seat.
- Approving. Approve the device in the Fabreasy Portal, Users tab. Until then the password portal does not work on that computer.
- Organisation password. SendReady asks for it at startup. Get the emergency card and enter it once; after that the computer has the key. Every staff member does this on their own account, even on a computer where a colleague is already connected.
- Agreement by e-mail. In SendReady, open Confirmations and Settings…, and set the same agreement address and the same agreements folder as on the other computers. Under the mailboxes, choose only what this staff member needs to read: a shared mailbox only needs to be read on one computer. SendReady asks for the agreement address, permission and agreements folder itself the first time (Set up agreement by e-mail); each employee gives permission to read the mailbox personally, and it does not travel with a settings file.
- Transferring settings (if you wish). On the old computer, export an .exp file in Setup and import it on the new one. That replaces all settings and sets on the new computer. Passwords and the organisation key are not included: they come via the organisation password and the addresses in the portal. Afterwards, check at step 4 that the agreement address and agreements folder are correct. Addresses with a fixed password outside the portal are taken along with the SendReady backup; see Taking your settings to another PC.
Two devices per user are included; the third and fourth together count as one extra user. A device that has not been seen for 30 days drops off automatically.
One agreements folder for the whole office
For every document sent with buttons, SendReady creates a folder in the agreements folder: the sent document, the codes, and later every response e-mail. SendReady only assesses a response if the folder of that document sent is in the agreements folder. For an office with several workstations that means:
- Choose a shared folder. A folder on a network drive or in a synchronised SharePoint folder, the same on all computers. Then it does not matter which colleague reads a response: every computer finds the document sent.
- Colleague absent. A response waits in the shared mailbox until someone clicks Read mailboxes or drags the e-mail onto Confirmations. The sender’s computer does not need to be on for that.
- Access. Anyone with access to the agreements folder can read the responses and the customers’ remarks. Only give access to those who may see the case files.
- The same response on two computers. If two computers read the same mailbox, a response is still recorded only once.
If a response is listed as “not in this agreements folder”, the document was sent from a computer with a different agreements folder. Set the same one on all computers and read again.
Terminal server
On a terminal server (Remote Desktop) every staff member has their own seat, their own organisation key and their own settings, just as on their own computer. A staff member counts as one device there, even someone who signs in on different servers in the farm. Choose a shared agreements folder there too. Log out of the Fabreasy Portal when you are done.
Mac and iPhone
- The office: SendReady only works on Windows.
- The customer on a Mac or iPhone: the protected PDF asks for the password, just as on Windows. If opening it in Preview does not work, Adobe Acrobat Reader does. If a button on the last page does not open an e-mail, that page explains how the customer can e-mail themselves; the customer can also open the document on the agreement page, which works in the browser. The password page works in the browser. The customer checks the hash value with the command for the Mac on the Check whether it is the same file page.
Fabreasy SendReady & Confirm
Agreement by e-mail
A document with the buttons Agree, Not yet agreed and Do not proceed on the last page. Your customer chooses a button, their own e-mail program opens a ready-made message to your office, and the customer sends it themselves. SendReady reads that message in your mailbox and records it in a folder of your office. Fabreasy is not in between: no document, no response and no remark goes to a Fabreasy server.
How do you know the customer opened the document? Behind each button is a code of its own. It is in the encrypted part of the PDF and can only be read by someone who opens the document with the password. A response only counts if the e-mail contains the code of that button. An e-mail without a valid code (“fine by me!”) goes under To check, never under agreed.
The e-mail also states what the customer chooses, in the customer’s own words: “I have read this document and agree with this version.” What is established is that the document was opened with the password; Fabreasy does not measure the reading itself. Agreement by e-mail does not replace a signature.
1. Setting up, once
The first time you ask for approval, SendReady opens Set up agreement by e-mail: the agreement address, your permission to read the mailbox, and the agreements folder. You may save without permission; you then drag response e-mails onto Confirmations yourself. Later you change everything in Confirmations, then Settings…. Everything you change there is saved straight away.
- Agreement address. The address your customers e-mail to. Choose a shared mailbox, for example agree@youroffice.com: a colleague then sees a response even when you are away, and responses are not mixed with your ordinary e-mail. Without an agreement address a document gets no buttons; SendReady says so when you send.
- Agreements folder. For each document sent, a folder with the sent document, the codes, every response e-mail and a summary is created here. If you work with more than one computer or with a shared agreement address, choose a folder on a shared drive or in a synchronised SharePoint folder; with a licence for several users, SendReady warns you when only you can see the folder. A computer that cannot see the folder cannot assess a response: it reports the response as “not in this agreements folder” and does not guess. Without a choice, the folder is in your Documents, under Fabreasy\Akkoorden; anything still in the old place in your profile (Fabreasy\Akkoord) moves there by itself. An administrator can set the folder for everyone in the registry:
HKLM\SOFTWARE\Fabreasy\Akkoord, valueDossiermap. - When the buttons are added. A tick for each letterhead set: ticked = every document with that set and a TO: label gets buttons. There is no default for every document: that way an invoice or newsletter never gets buttons unasked. For a single document, add
:confirmafter the label (in SendReady and the ribbon: Ask for approval) or putCONFIRM:yesin the document.CONFIRM:yesorCONFIRM:noin the document always takes precedence. Double-click a set to give it its own agreement address, for example for a second branch. - Permission and mailboxes. SendReady only reads a mailbox once you give permission; this applies per Windows user. It then reads only the Inbox and Junk E-mail, only mail since the oldest sending that is still open (at most 120 days back), and copies only an e-mail with the code of a button to the agreements folder; it moves, deletes and sends nothing. When and by whom permission was given is shown at Permission…, where you can also withdraw it. If you read a colleague’s mailbox or a shared mailbox, agree on this within the firm with the people concerned. With no mailboxes ticked, SendReady reads only the mailbox of the agreement address; with Get from Outlook and ticks you choose yourself. A shared mailbox (agree@) must be in your Outlook: your administrator gives you full access (Full Access), and Outlook shows it after a restart, sometimes only after an hour. A shared mailbox only needs to be read on one computer. More is fine too: a response is recorded once, even if two computers see it.
- Test to yourself. Send a document with
TO:your own address andCONFIRM:yes, and click a button yourself. You then see exactly what your customer sees, and you see the response come in.
Agreement by e-mail is part of your licence when Confirm is on it. If it is not, the processor says so for a document with CONFIRM:yes, and the e-mail goes out without buttons.
2. Sending
A document gets buttons when all three of these are in place:
- a TO: label with the customer’s address (choose it in the SendReady ribbon in Word; see Preparing documents for SendReady);
- a password: the document is encrypted. Without a password there are no buttons, because the codes would then be readable in the file and a code in a response would mean nothing. You get a message and the e-mail goes ahead;
- agreement requested:
:confirmafter the label,CONFIRM:yesin the document, or a set that has it switched on.
What happens then:
- The processor adds an extra page at the end with the document name, the reference (for example
FR:7KQ2M9XA), the three buttons and a line for anyone without an e-mail program. Only then is the document encrypted. - Before Outlook opens, the processor records the document sent in the agreements folder: exactly the PDF that goes in the e-mail, with the codes. If that fails (the shared drive is briefly unavailable), NO e-mail opens. A document with buttons of which nothing was recorded cannot be assessed later; send it again as soon as the folder is back.
- Outlook opens as usual, with one extra line in the text: “You can respond to this document with the buttons on the last page of the attachment.” Check it and send.
What the customer sees. The customer opens the PDF with the password and finds the three buttons on the last page. A click opens a new message to your agreement address, with the choice, the document name and the reference in the subject, and the choice, the reference, the code and the statement in the text. With Not yet agreed the customer types the remark below it. The customer sends the message themselves, from their own mailbox; no website opens and nothing needs to be typed in. If the button does not work (no e-mail program on that computer), the page explains below how the customer can send an e-mail themselves with the reference and the code.
The customer’s remark is readable in the e-mail, like any other e-mail from the customer to you.
Responding with a confidential remark. Below the buttons is the address of the agreement page (pdfcreator.fabreasy.com/akkoord/). If the customer wants to give a remark that only your office can read, the customer opens the document there with the password, chooses a button and types the remark. The page encrypts the remark in the customer’s browser, with a key that belongs to this document, and prepares the e-mail in the customer’s own e-mail program. The customer sends it themselves, just as with the buttons. The page makes no connection to Fabreasy: the document, the password and the remark stay in the browser. Only your office can open the remark, with the key in the agreements folder; SendReady does that automatically and shows the remark in Confirmations.
3. Collecting and checking responses
Open Confirmations in SendReady. The list comes from the agreements folder: every document sent with buttons is in it, including your colleagues’ if you use the same folder.
- Read mailboxes reads the Inbox and Junk E-mail in classic Outlook, read-only. SendReady moves nothing, marks nothing and sends nothing. Every response goes into the agreements folder with the headers as it arrived (the .msg), with the outcome next to it. Without your permission SendReady reads nothing; the page then shows Give permission….
- Dragging works too: one or more e-mails straight from Outlook onto the list, or a saved .eml or .msg. Add response e-mail… does the same with a file. That is the way with the new Outlook (which does not let SendReady read along) and with webmail: save the e-mail and drag it in.
Collecting or dragging the same e-mail twice does no harm: it is recorded once.
The statuses.
| Status | What it means | What you do |
|---|---|---|
| Waiting for a response | Sent, no response in yet | After a while: Prepare a reminder… |
| Read and agreed | The e-mail contains the code of the Agree button, from the address the document was sent to | Nothing. The response is in the agreements folder |
| Not yet agreed (see remark) | Code of that button; the customer has a remark | Read the remark, adjust the document and send it again |
| Rejected: do not proceed | Code of that button | Contact the customer |
| To check | There is a response, but something is not right: no valid code, more than one code, a different sender address, or received after you marked the document sent as lapsed | Read the line below the remark and the e-mail itself (Open folder). If in doubt, call the customer, and send again if needed |
| Replaced by a newer version | You sent a newer version of the same document to the same customer | Nothing; the new version has a line of its own |
| Lapsed | You marked the document sent as lapsed | Nothing. See below |
Click a line: below it are the customer’s remark and a line in plain words, for example “Response from customer@example.com · code is correct: opened with the password · mail check passed (example.com)”. The mail check is what your own mail server said about the sender (DKIM, SPF, DMARC); SendReady only looks at what your own server added, not at what the sender can send along.
If two responses arrive for one document sent, the newest counts: a customer may move from “not yet agreed” to “agreed”.
Prepare a reminder… opens a new e-mail to the customer with a short text: open the document with your password and choose a button on the last page. There is no link in it; the buttons are in the document the customer already has.
Mark as lapsed… is for a document sent that is no longer needed, for example because the document does not go ahead. A sent e-mail does not come back: let the customer know themselves that responding is no longer needed. If a response still arrives after that, the line goes under To check.
A new version. Send the adjusted document with the same name to the same customer. It gets a new reference and new codes, because an agreement belongs to the final version. The previous document sent goes to Replaced. If the customer still responds to the old version, that is stated: “note: response to an earlier version”.
Open summary (or double-click a line) opens the summary of that document sent: the status, the timeline with times and what each file in the folder is. It is in the folder as Agreement summary - <document>.pdf, and SendReady recreates it with every response, when you mark it as lapsed and with a new version. Every time says which clock it comes from: prepared (the PC that created the e-mail), received (your office’s mail server) and recorded (the PC that wrote the response to the folder).
Open folder opens the folder itself. In it, next to the summary:
verzending.txt: reference, document name, recipient, agreement address, time, the codes, the hash value of the sent document, the key of the file, and the previous version if there was one;verzonden.pdf: exactly the file the customer received;- for each response the e-mail as it arrived (
reactie-<time>.msgor.eml) and the outcome (reactie-<time>.txt); stand.txtif you marked the document sent as lapsed.
These are ordinary files, readable without Fabreasy. Check whether it is the same file… looks up a document in the agreements folder by its hash value; see Check whether it is the same file. Export overview… creates a file for Excel from the lines now in the list.
4. Keeping
The record belongs to your office and is only in your agreements folder. Keep it for as long as your professional rules require. Fabreasy never cleans up anything in that folder, not even when SendReady is removed or reinstalled.
- Include the agreements folder in the office’s normal backup.
- Only give access to those who may see the case files. The folder contains the key that opens the sent document; it is no more secret than the document itself, which your office has anyway.
- You can move the folder of one document sent as a whole to your document management system. Only move it when no more response is expected: SendReady only assesses a response if the folder of that document sent is in the agreements folder.
5. What Fabreasy knows, and what it does not
| Data | Where it is | Fabreasy |
|---|---|---|
| The sent document | In the e-mail to the customer and in your agreements folder | Does not know it |
| Reference and codes | In the document (encrypted) and in your agreements folder | Does not know them |
| The customer’s response and remark | In the customer’s mailbox (sent), in your mailbox and in your agreements folder; a confidential remark encrypted | Does not know them. The agreement page is on a Fabreasy site, but only works in the browser and sends nothing back |
| Your agreement address and agreements folder | In the settings on your computers | Does not know them |
| The password the customer chose, if you use the password portal | In the password portal, encrypted with your organisation’s key | Stores it encrypted and cannot read it. That is the portal, not the agreement |
| Your licence | Licence check, as always | Knows that agreement by e-mail is on your licence, not whether or when you use it |
The customer’s e-mail goes via the customer’s mail provider to your office’s mail provider, like any other e-mail.
6. What if…
| What if… | What happens | What you do |
|---|---|---|
| The customer changes the subject or removes the reference | Does not matter: SendReady recognises the response by the code | Nothing |
| The customer e-mails “agreed” without clicking the button | No valid code: the line goes under To check | Ask the customer to use the button in the document, or record it by phone in your file |
| Someone in CC responds without opening the document | No valid code: To check | Nothing, or ask; a response without a code does not count as agreed |
| The customer responds from a different address (private, or a colleague) | The code is correct, but the line goes under To check with “note: not the address the document was sent to” | Check whether that sender may respond on behalf of the customer, and record it |
| Someone else reads the customer’s mailbox (secretary, hacked account) | Whoever can open the document with the password can click a button | Agree with the customer who has the mailbox and the password. If something must be signed, use a signature on paper or a qualified electronic signature |
| The response arrives with a colleague, or in Junk E-mail | SendReady also reads Junk E-mail. A shared agreement address with a shared agreements folder catches the rest | Use a shared agreement address; otherwise the colleague drags the e-mail onto Confirmations |
| “Response to a reference that is not in this agreements folder” | The document was sent from a computer with a different agreements folder | Set the same agreements folder on all computers (Settings…) and read again |
| The mail check failed or is missing | The sender has not been confirmed by your mail server. The code may still be correct | Check the e-mail; if in doubt, give the customer a call |
| The agreements folder is not available when sending | No e-mail opens; you get a message with the reason | Make sure the folder is back and send again |
| The customer has no e-mail program on that computer | The button opens nothing | The page explains how the customer can e-mail themselves: the reference in the subject and the code in the text |
| Read mailboxes says the mailbox of the agreement address is not in Outlook | A shared mailbox is not (yet) in your Outlook | Ask your administrator for full access (Full Access) and restart Outlook; it can take up to an hour. Until then: drag the response e-mail onto Confirmations |
| You use the new Outlook or webmail | Read mailboxes finds no classic Outlook | Drag the response e-mail onto Confirmations, or save it and choose Add response e-mail… |
| The document was edited after sending | Check whether it is the same file… does not find the hash value | The response applies to verzonden.pdf in the folder of that document sent. Send the new version again |
| The customer says: “I did not approve that” | The folder of the document sent contains the sent document, the customer’s e-mail with the headers as it arrived, and the code. With the key from verzending.txt you can verify that this code is in the customer’s document | Discuss it with the customer using the folder. If another version is in circulation, look at the reference |
| The computer is lost or SendReady is reinstalled | The record is in the agreements folder, not in SendReady | If the folder is on a shared drive: nothing. After reinstalling, set the same agreements folder again |
| Fabreasy stops | The agreements folder is yours and does not need Fabreasy: ordinary text files, PDFs and e-mails | Nothing. A document the customer already has keeps working: the buttons open an ordinary e-mail to your address |
Fabreasy SendReady & Confirm
Check whether it is the same file
Within half a minute you see whether a document is exactly the file you sent with buttons, and the one the customer responded to. With the hash value, the customer can also check which file a response was about.
What it is
SendReady calculates the hash value of the document and looks it up in the agreements folder of agreement by e-mail. Green means: exactly this file was sent, and the responses to it are in the folder of that document sent.
A hash value belongs to exactly one file. A document that was saved again or edited after sending, even by a single character, has a different one. For every document sent with buttons, the processor records the sent file in the agreements folder (verzonden.pdf), with its hash value in verzending.txt.
The record itself is in your agreements folder: for each document sent, the sent document, every response e-mail as it arrived, and a summary (Agreement summary - <document>.pdf) that sets out what happened and when, and what each file in the folder is. SendReady recreates the summary with every response; in the Confirmations window you open it with Open summary or by double-clicking a line. With Export overview… you save the documents sent in the list as CSV. Fabreasy signs nothing and sees no document and no response.
If you have a set in Letterhead sets that signs PDFs digitally with your certificate, the right-click menu in Confirmations also has Save signed summary…: SendReady saves a copy of the summary and signs it. You enter the PIN of the card or USB token; the PDF gets a signature with a timestamp from the issuer, and every PDF reader shows whether it has changed since it was saved. A copy, because the summary itself is recreated with the next response. It is your own signature; Fabreasy signs nothing.
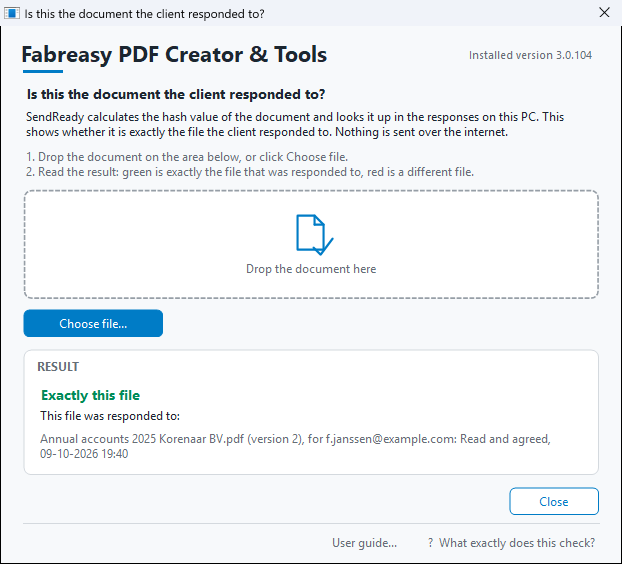
The window in SendReady, with the result you want to see: green, exactly this file, and the sent document that received the response.
How to do it
This is how it works from SendReady 3.0.105. The check runs on your computer; nothing is sent over the internet.
- In SendReady, open the Confirmations window and click Check whether it is the same file….
- Drag the document onto the area in the window, or click Choose file…. That is the sent document:
verzonden.pdffrom the folder of the document sent, the attachment from your Sent Items folder, or the PDF the customer sends back to you. Not the response e-mail. SendReady also recognises the file you dropped on Drag & Drop to make it: as the source file. - Read the result.
| Result | What it means | What you do |
|---|---|---|
| Exactly this file (green) | This file was sent with buttons. Below it are the sent documents: document, version, address, status and time | Nothing. With Open folder in Confirmations you find the responses |
| The source file of a sending (blue) | The sent document was made from this file, and it has not changed since. It is not the sent document itself: that has the page with the buttons and is encrypted. Below it are the sent documents | Nothing. The response is about the sent document; it is in the folder of that document sent as verzonden.pdf |
| Not this file (red) | This file differs from what was sent, even if only by one character. A file with the same name was sent, though; those sent documents are listed below | A response applies to the file that was sent, not to this one. Take verzonden.pdf from the folder of that document sent, or send this version again |
| No response to this file | The agreements folder contains no document sent for this file, and it is not the file one was made from either | A copy that was saved again or printed has a different hash value: take the sent file or the file you dropped. Also check whether this computer has the same agreements folder as the computer it was sent from (Settings…). A document without buttons is never in it |
The window tells you which file a response was about. Whether a response is valid (the code, the address, the mail check) is shown in Confirmations at the line itself.
Explanation for the customer
The response is an e-mail the customer sent themselves; a copy is in their own Sent Items folder. What your office keeps, the agreements folder with the sent document and the response e-mail, is your office’s own records, like a saved e-mail. What the customer can check themselves is which file a response was about:
- The hash value belongs to exactly one file.
verzending.txtin the folder of the document sent, the Confirmations window and the PDF of a response show the hash value of the sent document. A document that was edited afterwards has a different one. - The customer compares the hash values. The customer asks your office for that hash value, calculates the hash value of the PDF from their own mailbox and compares them. If they match, the response was about exactly that file.
- Fabreasy signs nothing and sees nothing. The document, the buttons and the response go from mailbox to mailbox; Fabreasy is not in between. If there is a digital signature on a PDF of a response, it is the office’s own, with its own certificate; the PDF reader then shows whether the PDF has changed since it was saved.
| Computer | Command |
|---|---|
| Windows (Command Prompt) | certutil -hashfile "file.pdf" SHA256 |
| Mac (Terminal) | shasum -a 256 "file.pdf" |
If the customer asks for the hash value, give them the one from verzending.txt or from the Confirmations window.
What it does not show
Who pressed the button. A response with a valid code shows that the document was opened with the password, because the code is only in the encrypted part, and that the e-mail came from that address. Anyone with access to the customer’s mailbox who has the password can respond. It is a working arrangement with the customer, not a signature. If a document needs to be signed, agreement by e-mail is not the way to do it: use a signature on paper or a qualified electronic signature.
Agreement by e-mail is also not a trust service within the meaning of the eIDAS Regulation: the document and the response do not go through Fabreasy, and Fabreasy records nothing.
When to use it
| Moment | What you check |
|---|---|
| In a complaint (“I did not approve that”) | The sent document from the folder, with the response e-mail next to it; then you discuss it with the customer, using the explanation above |
Fabreasy SendReady & Confirm
What if…
Agreement by e-mail is as strong as the customer’s mailbox, the document’s password and the office’s computer. Whoever has access to those can respond on the customer’s behalf or send on the office’s behalf. What you keep in the agreements folder (the sent document, the codes and the response e-mails) is the office’s own records. For each situation, what happens and what you do; situations around the customer’s own e-mail (a different address, no code, the new Outlook) are on the page Agreement by e-mail, under What if.
| What if… | What happens | What you do |
|---|---|---|
| Someone else reads the customer’s mailbox (shared mailbox, secretary, hacked account) | Whoever can open the document with the password can click a button and send the e-mail. The response shows that the document was opened and which address the e-mail came from, not who pressed the button | Agree with the customer who has the mailbox and the password. If a document needs to be signed, agreement by e-mail is not the way to do it: use a signature on paper or a qualified electronic signature |
| A fake e-mail pretending to be from your office | The customer opens an attachment that does not come from you. A button in it e-mails an address that is not yours, or yours without a valid code; the latter goes under To check | Have your IT partner set up SPF, DKIM and DMARC for your e-mail domain. Tell customers that your office never asks for the password of the PDF by e-mail, and that the buttons always prepare an e-mail to your own agreement address |
| Someone sends a response pretending to be the customer | Without opening the document they do not know the code: To check. Your own mail server usually spots a forged sender address: SendReady then shows “mail check failed”. SendReady only looks at what your own mail server added, not at what the sender sends along | Check the e-mail with Open folder; if in doubt, give the customer a call |
| An office computer has been hacked | Whoever controls that computer can send on behalf of the office and read and alter the agreements folder. The customer always has their own copy: the document in their mailbox and their response in Sent Items. If a PDF of a response signed with your certificate changes afterwards, the PDF reader shows it | Treat it as a data breach. Remove the device on the Users tab and have the computer cleaned before it connects again. Ask Fabreasy for a new licence key |
| The document was edited after sending | Check whether it is the same file… shows red: not this file | The response applies to verzonden.pdf in the folder of that document sent. Send the new version again; see Check whether it is the same file |
| A document was printed from Word and only e-mailed | The document itself is in the Windows temporary folder, but the document sent is in the agreements folder as usual, with verzonden.pdf | Nothing for the agreement. From now on, save the report in the customer’s case folder first (office arrangement) |
| Fabreasy is briefly unavailable | For agreement by e-mail that makes no difference: sending, reading responses and checking happen on your computer and in your e-mail. Only the password portal waits: if a customer has just chosen a password that the computer does not know yet, it does not make the document and says why. The customer never gets a PDF without the password they chose | Nothing; send that document when Fabreasy is back |
| The agreements folder is not available (network drive gone) | When sending with buttons no e-mail opens; you get a message with the reason. A response can only be read once the folder is back | Make sure the folder is back and send again. Responses stay in the mailbox until you read them |
| SendReady is reinstalled, or the computer is lost | The record is in the agreements folder, not in SendReady | If the folder is on a shared drive: set the same agreements folder again after installing. If it was on the computer itself: restore it from the backup, and choose a shared folder from now on. Addresses with a fixed password outside the portal are restored with the SendReady backup; see Taking your settings to another PC. |
| Fabreasy stops | The agreements folder does not need Fabreasy: ordinary text files, PDFs and e-mails. The hash value of a document can always be calculated with the command for Windows or Mac. A document the customer already has keeps working: the buttons open an ordinary e-mail to your agreement address | Keep the agreement address for as long as responses may come, and keep a late response with the folder of that document sent |
| The customer says: “I did not approve that” | The folder of the document sent contains the sent document, the response e-mail with the headers as it arrived, and the code that was only in the opened document | Open the folder from Confirmations, read the response (which reference, which button, which address, when, what the mail check said), drop the document on Check whether it is the same file, and discuss it with the customer. Agreement by e-mail is a working arrangement, not a signature |
| A document went to a wrong address | Without the customer’s password the PDF cannot be read | Record the incident in your data breach register (that applies to every breach, even a small one) and decide whether to report it. Mark the document sent in Confirmations with Mark as lapsed…: a response that still arrives after that goes under To check |
| A PDF went out without a password | The address had no password, and so the document had no buttons either | Treat it as a wrong address, invite the customer to the password page after all, and check whether other addresses are missing the same |
| The customer has forgotten their password | The customer cannot open the PDF | Nothing: below every protected e-mail there is a link with which the customer chooses a new password |
Administration
A week with the Fabreasy Portal
Sanne Verhoeven is office manager at De Linde, an accountancy firm in Utrecht. The firm works with Fabreasy PDF Creator and SendReady, with six colleagues. Sanne looks after the licence, and she does that in the Fabreasy Portal. Follow her through a week: a different tab every day, with the screens as you see them yourself. Everything there is to know about each option is on the Reference page.
The firm, the names, addresses and amounts in this story are made up.
Monday 08:30 — Sanne signs in
Sanne has no password for the portal, and she does not need one. She opens pdfcreator.fabreasy.com/my-license, types the e-mail address the licence is registered to and clicks Send me a login link.
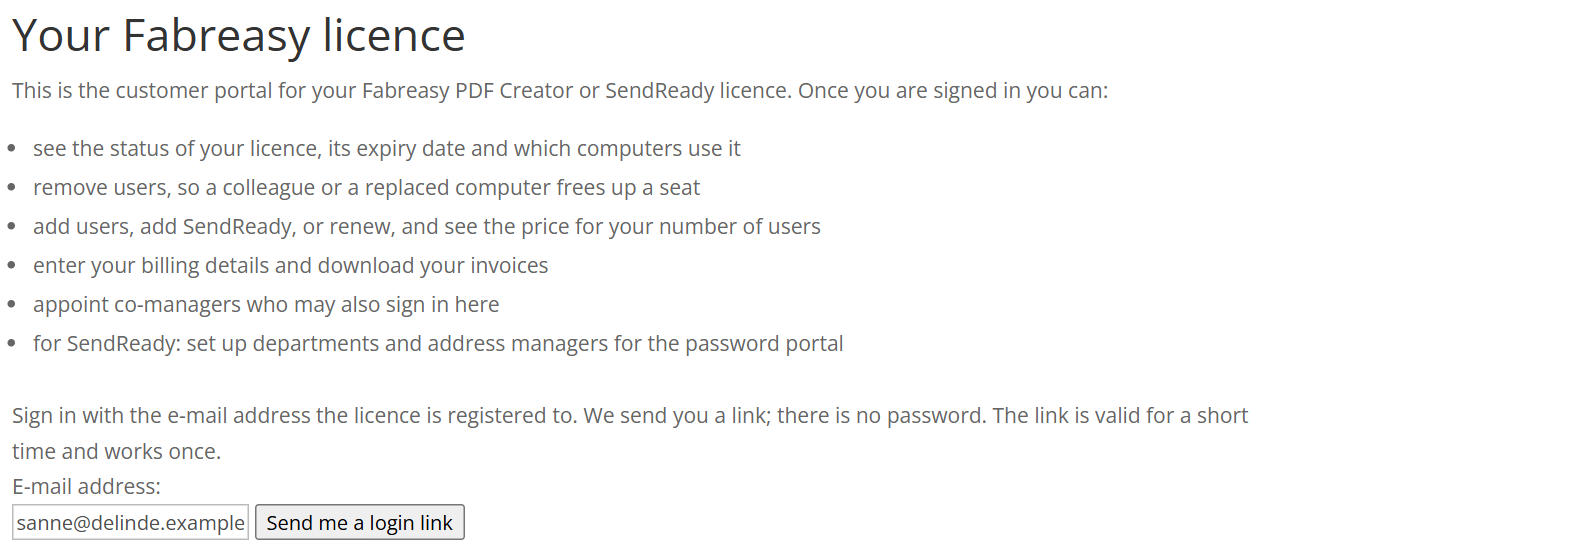
A minute later the e-mail is in her inbox. She clicks the link and sees a page with one button:

Why that extra click? De Linde’s e-mail security opens every link before Sanne reads the e-mail. Without the button that scanner would use up the link. Now it only counts as used when Sanne presses Sign in herself.
Good to know
- The link is valid for 30 minutes and works once.
- After signing in, Sanne stays signed in for 2 hours.
- No e-mail received? Check the Junk Email folder, or request a new link.
Monday 08:40 — Where do we stand?
The portal opens on the Licence tab. At a glance Sanne sees what the firm has: PDF Creator with SendReady, in De Linde’s name, valid for another 150 days, and 6 of the 10 user seats in use.
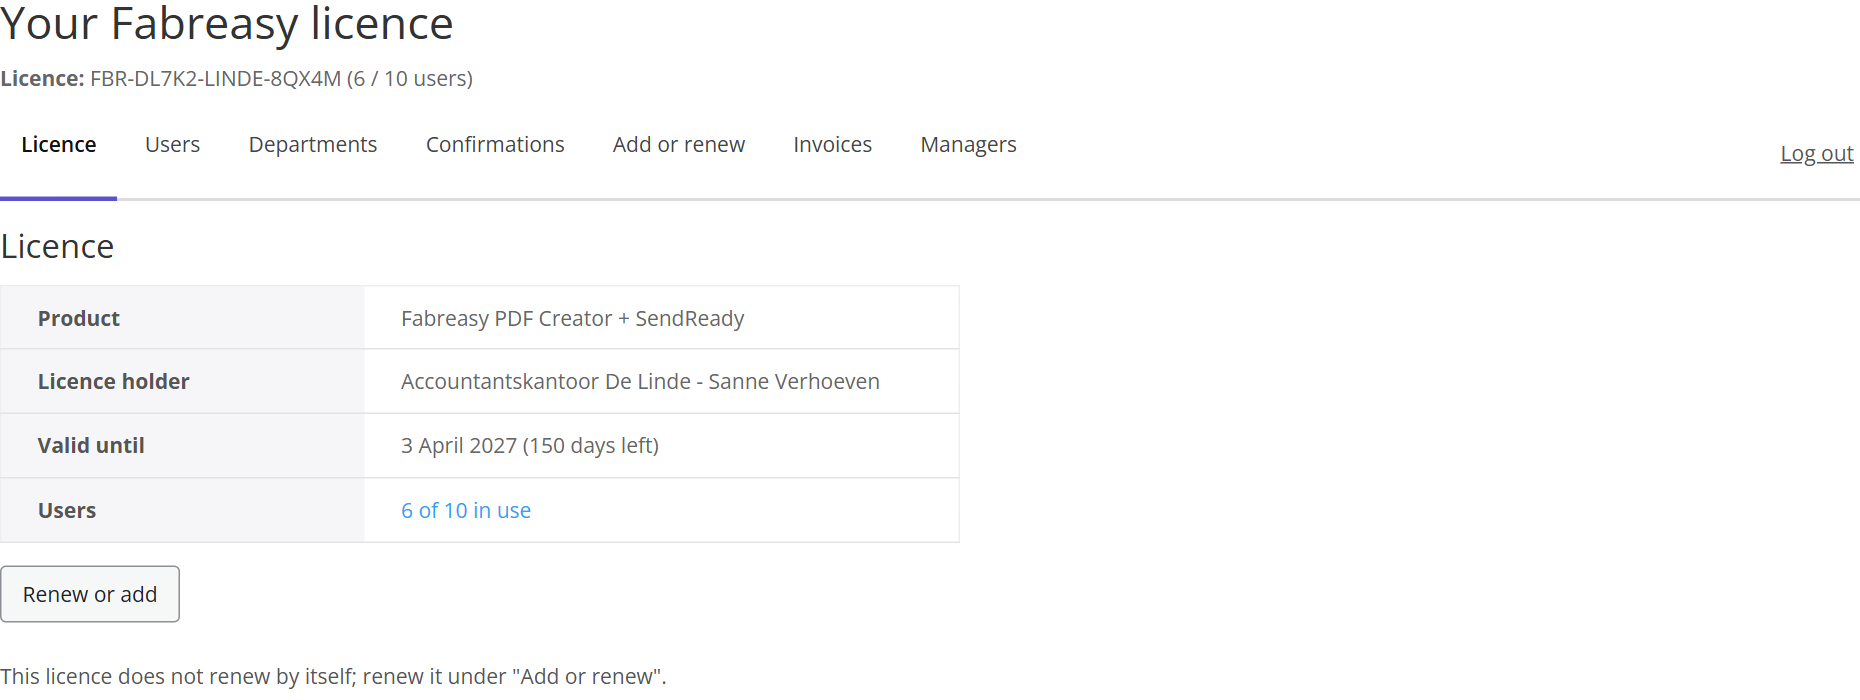
At the bottom it says what happens on the end date. At De Linde the licence does not renew by itself. Sanne receives a reminder 30 days and again 7 days beforehand, and then renews with the Renew or add button. If the firm renewed automatically, this is where the amount and the date of the debit would be, with a button to stop it.
The top of every page shows the licence key and the counter “6 / 10 users”. So Sanne sees it on every tab.
Monday 09:00 — Ruben works from home
Partner Ruben Bakker calls: he has installed SendReady on his home computer, but he cannot use the customers’ passwords there yet. Sanne opens the Users tab.
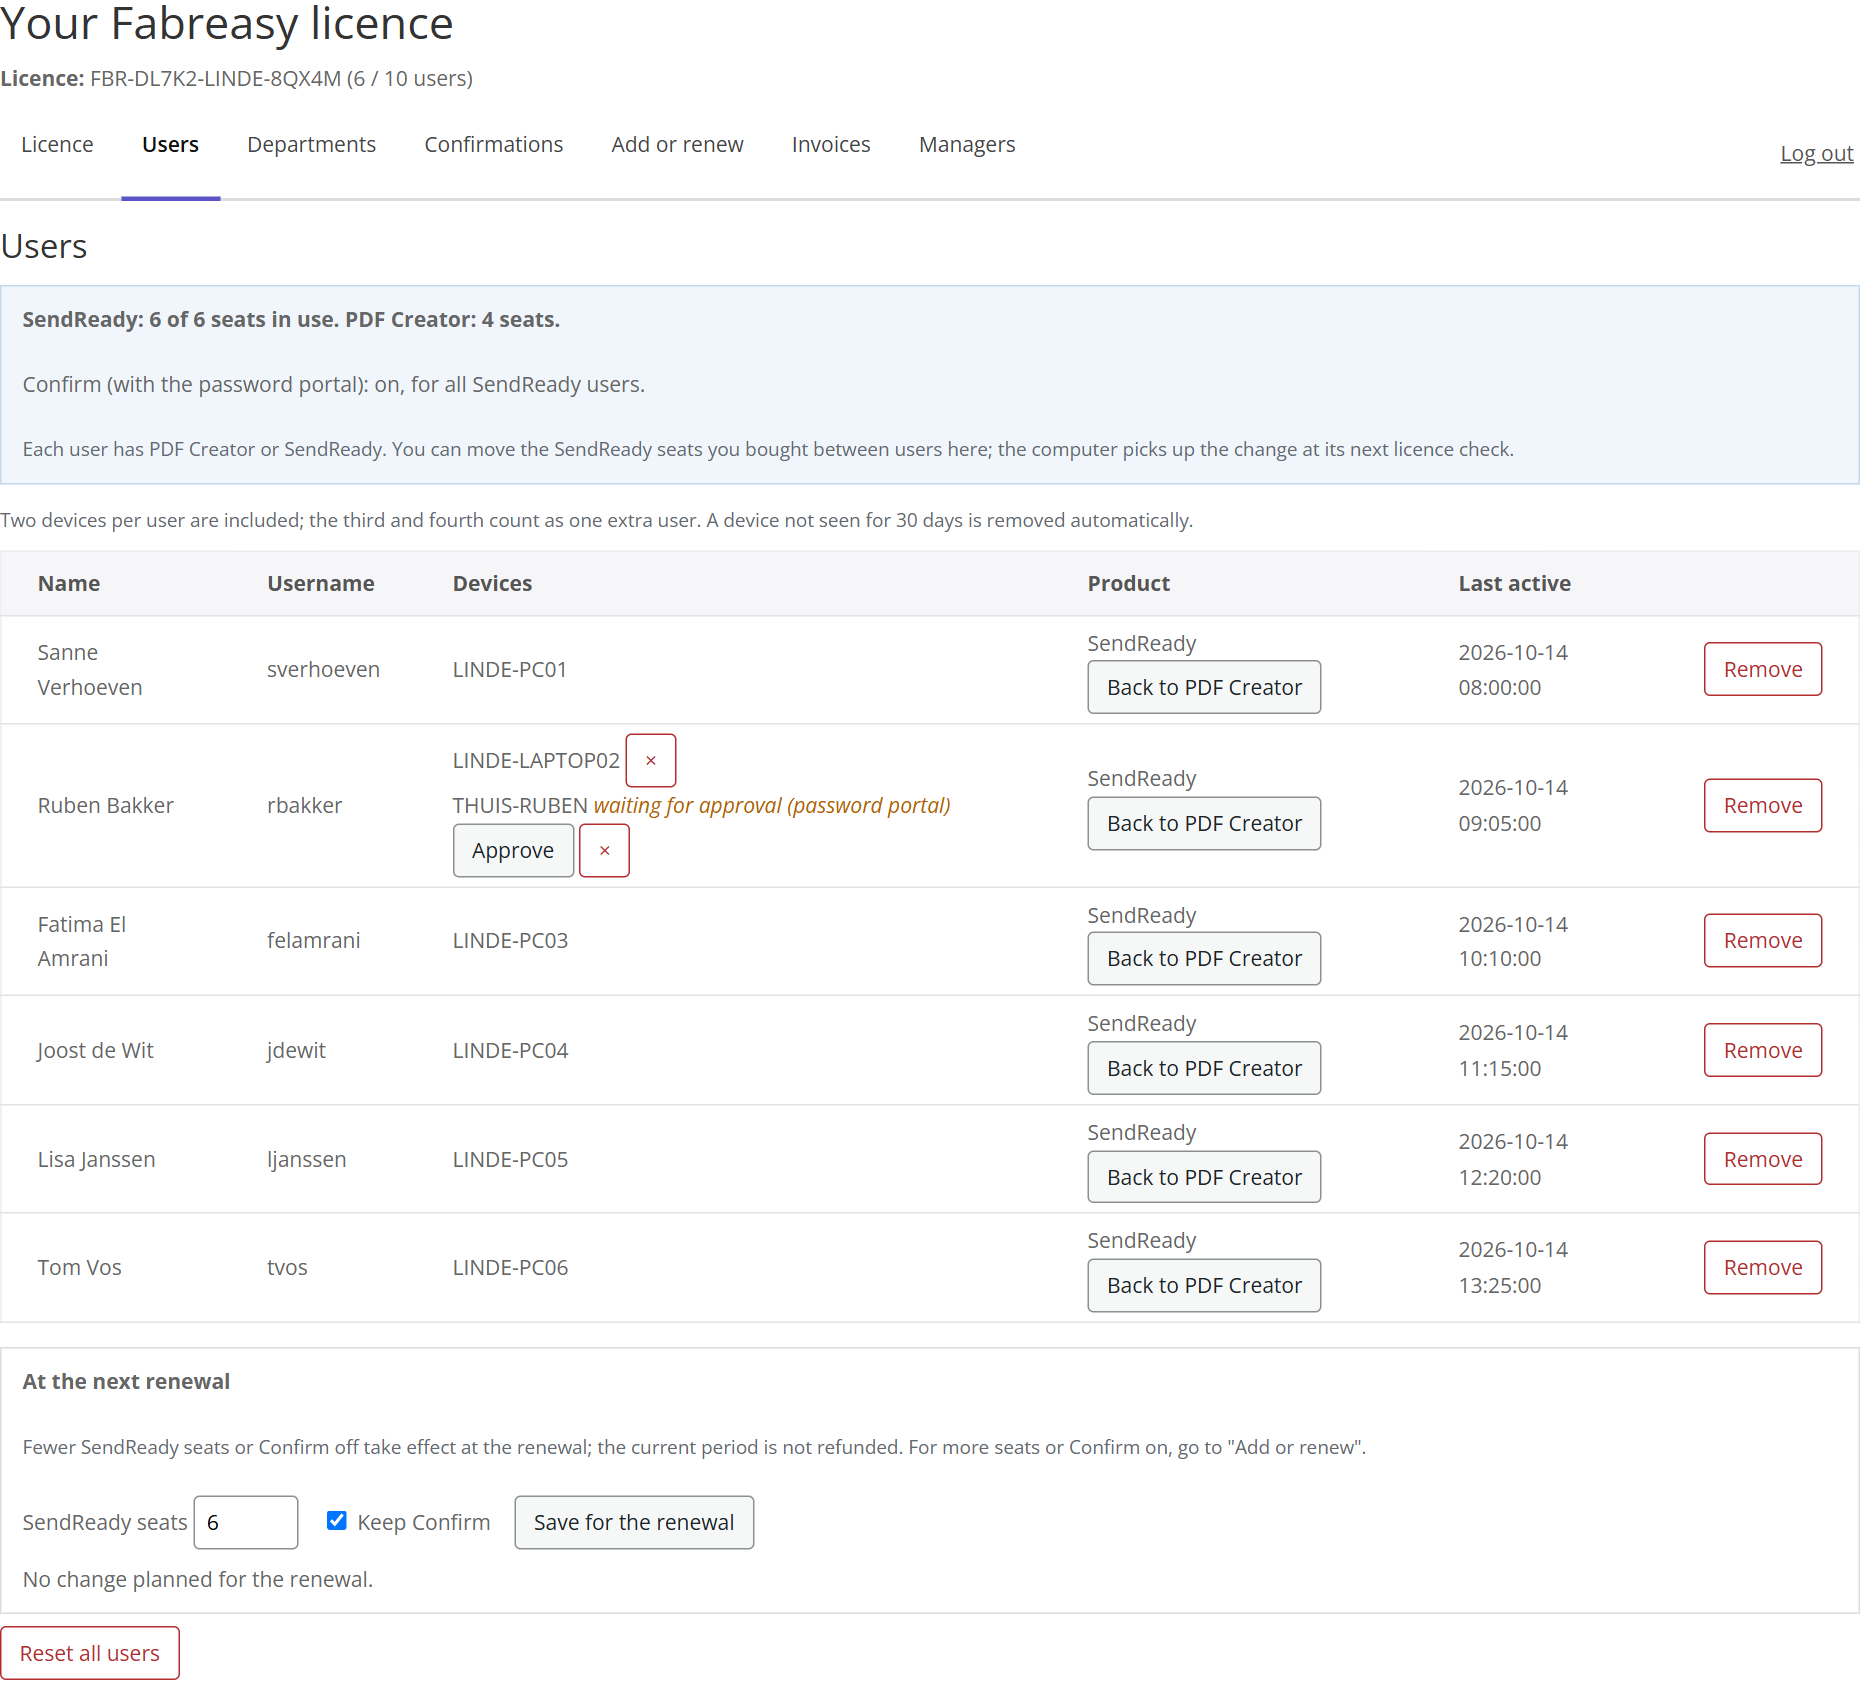
Nobody added the colleagues here: every user registers automatically the first time they start Fabreasy, as long as there is a free seat. Ruben now has two devices. His office laptop already works; the home computer is waiting for approval. Sanne recognises the device and clicks Approve. At the next start, the home computer picks up its access.
Had Sanne not recognised the device, she would have removed it with ×. That way an unknown computer never gets to the customers’ passwords.
Good to know
- Two devices per user are included. The third and fourth together count as one extra user.
- A device that has not been seen for 30 days drops off automatically.
- If a colleague leaves, Sanne removes that colleague with Remove. The seat becomes free immediately.
- Reset all users removes everyone at once, for example after a reorganisation. As a check, Sanne then types in the licence key; everyone then registers again automatically.
Tuesday — Who may do what?
Tom Vos, who recently joined Annual Accounts, wants to add a new customer in SendReady for his whole department. It does not work. That is correct: Tom is a member of Annual Accounts, not a manager. Sanne shows him the Departments tab.
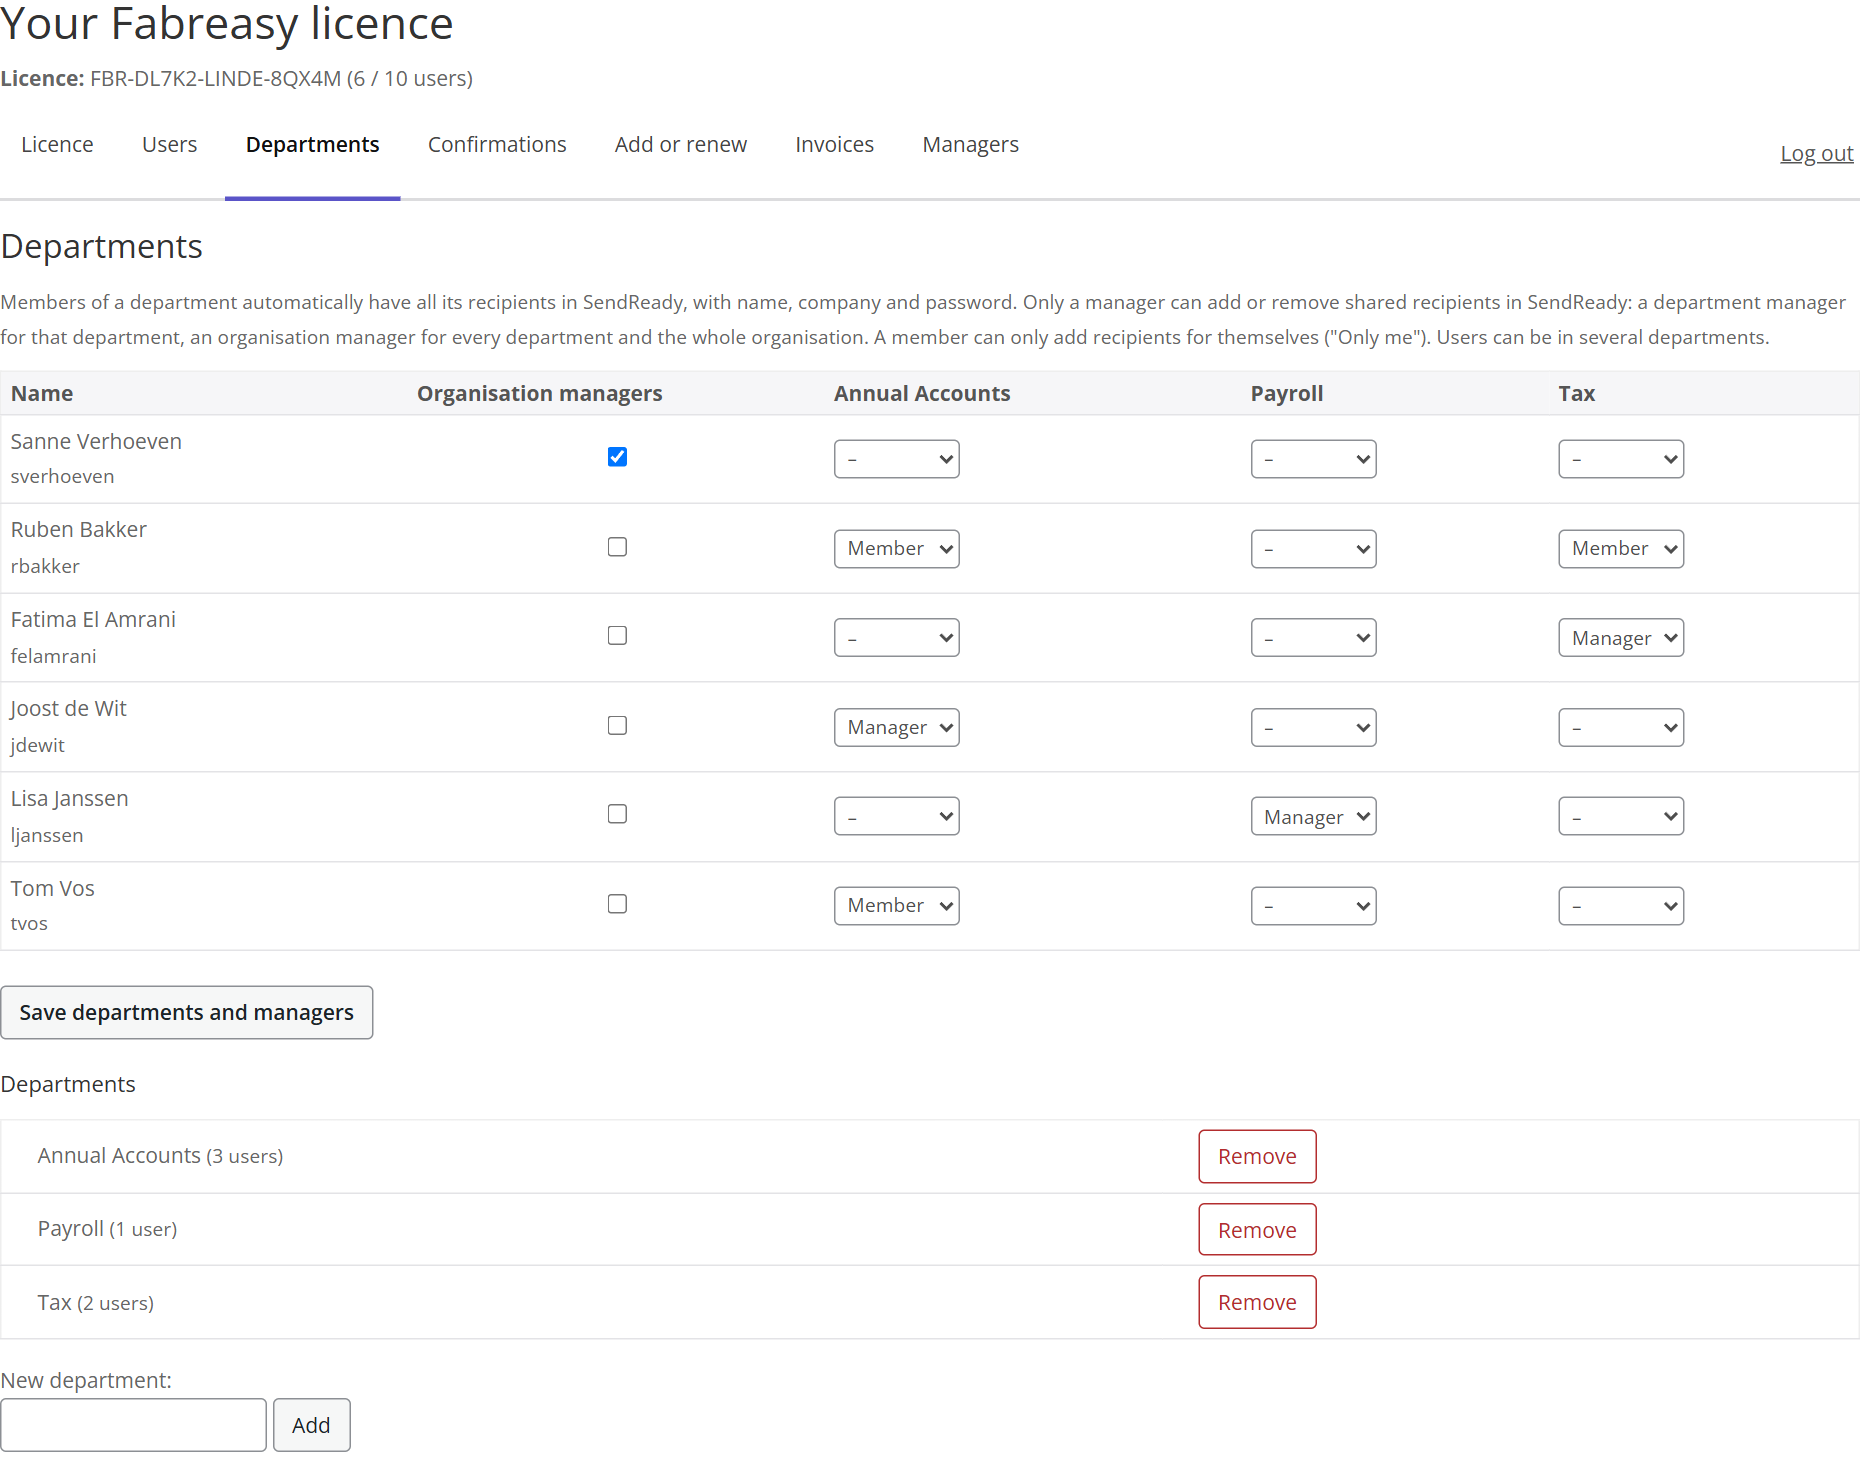
Each colleague has a row and each department a column. For each department Sanne chooses –, Member or Manager:
| Who | Role | What that colleague can do in SendReady |
|---|---|---|
| Sanne | organisation manager | add customers for every department and for the whole firm |
| Fatima | manager of Tax | add and remove customers of Tax |
| Joost | manager of Annual Accounts | add and remove customers of Annual Accounts |
| Ruben, Tom | member | use the customers of their department, with name, company and password; new customers only for themselves (“Only me”) |
So only a manager can add shared customers. From now on Tom asks Joost. If Tom needs to be able to do it himself, Sanne sets Tom to Manager for Annual Accounts and clicks Save departments and managers. Tom sees it the next time he starts SendReady.
Good to know
- Sanne creates a new department at the bottom, at New department.
- If she removes a department, its customers become customers of the whole firm. No address is lost.
- As long as not a single manager has been ticked, everyone may do everything. Handy for a one-person business; as soon as you tick one manager, the rules apply to everyone.
- The customer addresses themselves are not in the portal. A manager manages them in SendReady.
Wednesday — What are we waiting for?
The tax returns have to go out. Fatima sends them with the buttons for agreement: on the last page of the PDF are Agree, Not yet agreed and Do not proceed. A click prepares an e-mail to the office for the customer, which the customer sends themselves.
Sanne wants to know how things stand, but she does not need the portal for that. The responses go from the customer’s mailbox to De Linde’s agreement address; Fabreasy receives none of them, so the portal does not show them either. Sanne opens SendReady, Confirmations window, and clicks Read mailboxes. Because the office has one shared agreements folder, she also sees Fatima’s documents sent there: two are waiting for a response, and one is under To check because the customer replied from a private address. Fatima gives that customer a quick call.
Partner Ruben wants to be able to follow that overview too. Sanne had already invited him as a manager of the portal for that, but that is not necessary: with the same agreements folder he sees exactly the same in SendReady on his own computer.
How that works and what you set up is on the page Agreement by e-mail.
Thursday — More colleagues are coming
In November two new assistants start. There are still four free seats, so that fits. Still, Sanne checks Add or renew to see what it costs if the firm grows further.
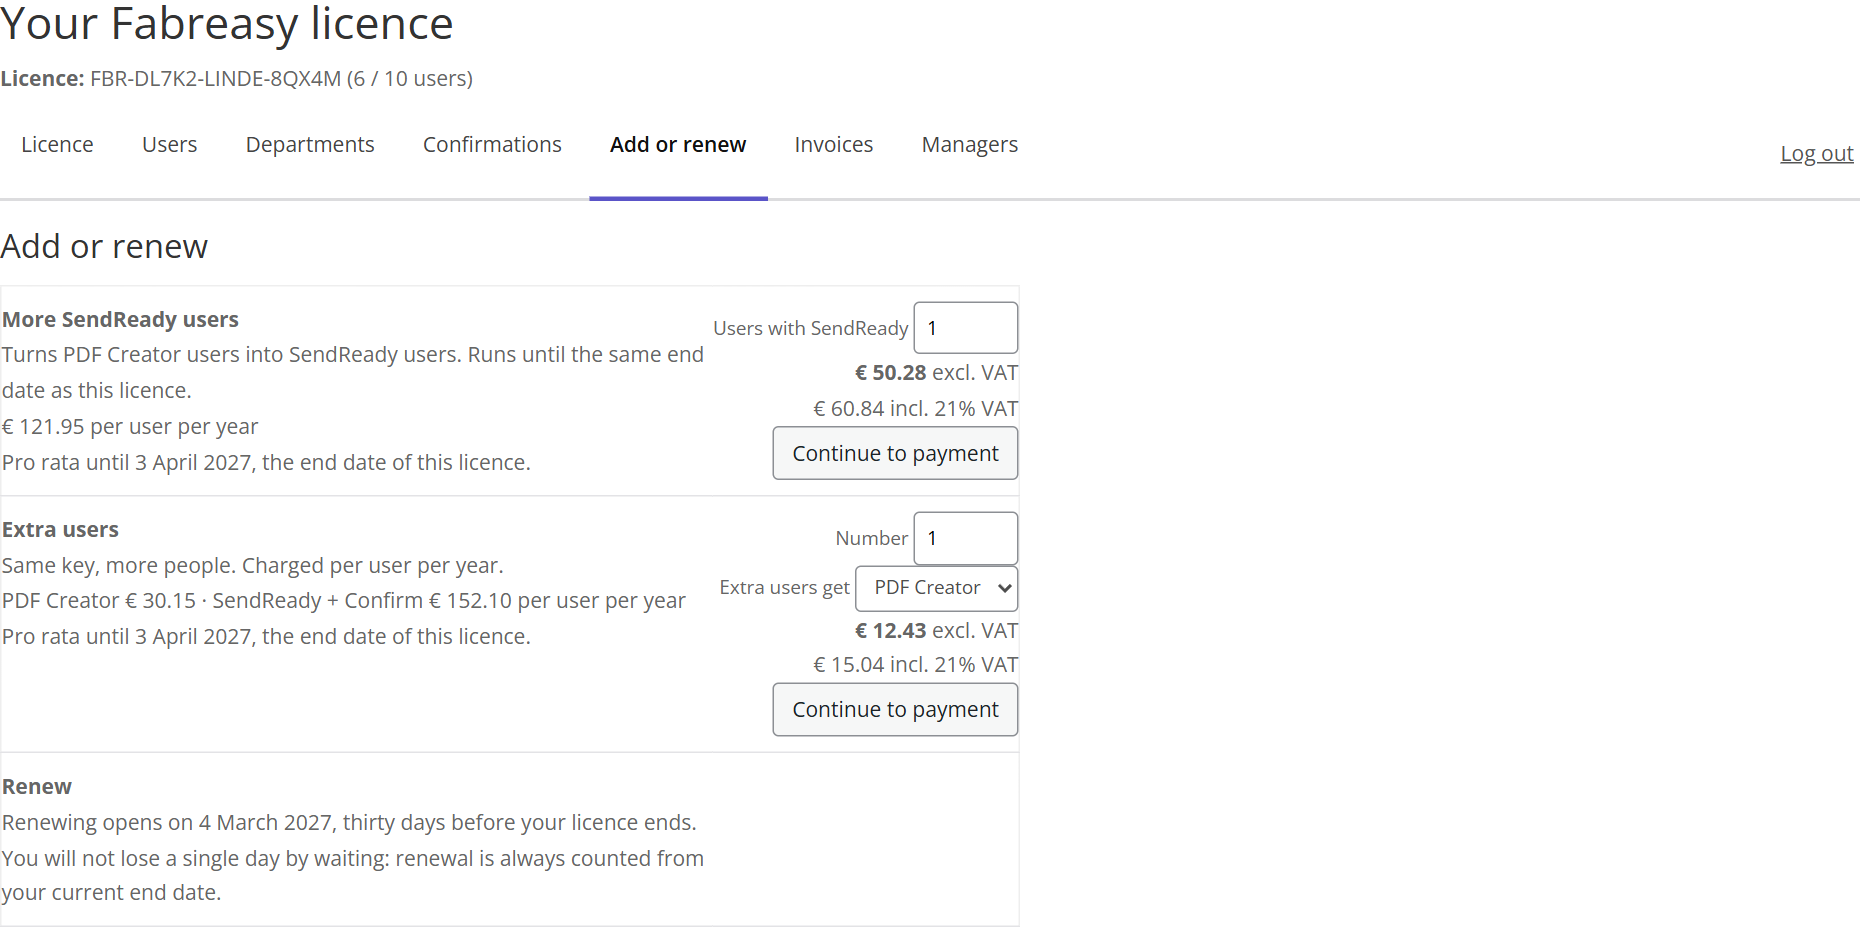
- Extra users. Sanne enters the number; the amount is calculated straight away. She only pays pro rata until the licence’s end date, with the amounts shown excluding and including VAT.
- More SendReady users. De Linde already has SendReady; here Sanne turns PDF Creator users into SendReady users. She pays the difference per user, with Confirm included, pro rata until the end date. A firm with only PDF Creator sees Add SendReady here, and a firm with SendReady but without Confirm also sees Add Confirm.
- Renew. Possible from thirty days before the end date; until then it shows the date from which you can renew. Waiting costs no days: a renewal always runs on from the current end date. When renewing, Sanne also chooses the number of users for the new year.
Continue to payment opens the payment page in a new tab. After payment it takes effect immediately, and the invoice appears on the Invoices tab.
The amounts in the screenshot are an example; the portal always shows the price that applies to your licence.
Friday — The accounts department
The accounts department asks for this year’s invoices, with the correct address on them. Sanne opens Invoices.
At the top are all invoices for the licence; she downloads one with pdf. Below that are the billing details: company name, contact person and address. What she changes here and saves with Save goes on the next invoice. Invoices that have already been sent stay as they were.
Actually, the accounts department would rather do this itself from now on. So Sanne makes the accounts department’s address a manager, on the Managers tab.
She types in the e-mail address and clicks Invite. The accounts department receives an e-mail with a confirmation link, valid for 24 hours. After a click on Confirm and sign in the status shows “Confirmed” and the accounts department can sign in itself from now on with a login link.
The list also still shows an invitation for Ruben: “Awaiting confirmation”. It is no longer needed: Ruben follows the responses in SendReady (Wednesday). Sanne clicks Remove behind it.
Note: a manager can do everything Sanne can: remove users, make payments, and add or remove other managers. So do not make anyone a manager who only wants to follow along.
Friday 17:00 — Logging out
Sanne is done and clicks Log out to the right of the tabs. On her own computer the session would expire by itself after 2 hours, but this week she is working on the shared computer at reception. Without logging out, the next user there could see the licence key, the colleagues and the invoices for up to 2 hours.
Next week she signs in again with a new link. All options and messages for each tab are on the Reference page.
Administration
Reference: all options of the Fabreasy Portal
In the Fabreasy Portal you manage your Fabreasy licence: who uses Fabreasy, how your organisation is divided up, and your invoices. This manual goes through the tabs one by one.
How to get to the Fabreasy Portal
This link takes you to the portal. You need the e-mail address that belongs to the licence. The login link is sent to that e-mail address:
https://pdfcreator.fabreasy.com/my-license/
Signing in
You sign in with a link sent by e-mail; there is no password.
- Open the portal page and enter the e-mail address the licence is registered to, or the address of a confirmed manager.
- Click Send me a login link. You always see the same message, even if the address is unknown; that way nobody can try out which addresses belong to customers.
- Open the e-mail and click the link. On the page that opens, click Sign in.
| Rule | Value |
|---|---|
| Login link valid | 30 minutes, and it works once |
| Session after signing in | 2 hours, after that request a new link |
| Language of the portal | before signing in, that of your browser; after that, the language of the licence |
The extra click on Sign in is deliberate. E-mail security such as Microsoft Safe Links opens links before you read the e-mail. Without that button the scanner would use up your link.
Does it say “This link has expired or has already been used”? Request a new one on the same page. If an automatic payment has failed and the licence is on hold for a while, you can still sign in. With a withdrawn licence that is no longer possible.
If you arrive via a link in a reminder e-mail, for example “renew”, the portal opens straight on that tab after you sign in.
Licence
The first tab shows what you have and until when. The top of every page also shows the licence key and the number of users, for example “2 / 25 users”.
| Line | What it means |
|---|---|
| Product | Fabreasy PDF Creator, SendReady, or “+ SendReady” if you have added SendReady |
| Licence holder | company name and contact person from your billing details |
| Valid until | the end date with the days remaining, or “no end date” |
| Users | “2 of 25 in use”; a click takes you to the Users tab |
Renew or add jumps to the Add or renew tab.
Below that you see what happens on the end date:
- No automatic renewal. You renew yourself. Fabreasy sends you a reminder 30 days and again 7 days beforehand.
- Automatic renewal. You see the date and the amount that will be debited then. Stop automatic renewal stops it. Your licence then simply runs until the end date.
- Subscription via Dodo. The Manage subscription link opens the customer area of the payment service. There you cancel, or change the payment method or the number of users.
If a SendReady trial is running, a yellow block appears at the top. It shows until when the trial runs and when the trial data will be deleted (addresses and recipients’ passwords). If you buy before that date, everything stays in place; the Buy or extend button takes you there. Did you buy a separate licence with SendReady and Confirm on the same e-mail address? Then within a day you receive an e-mail with a button to move the trial data to it; without that click, the data is deleted on the deletion date. Your acceptance of the data processing agreement does not move along: you give it again for the licence you bought.
Users
This lists everyone who uses Fabreasy with this licence. You do not need to add anyone: a user registers automatically the first time they start Fabreasy, as long as there is a free seat.
| Column | What you see |
|---|---|
| Name | the display name from Windows, for example “Anna de Vries” |
| Username | the Windows sign-in name |
| Devices | the computers this user works on |
| Last active | the last contact with the licence server |
Devices. Two devices per user are included. The third and fourth together count as one extra user. A device that has not been seen for 30 days drops off automatically. If a user has more than one device, each device has an × behind it to remove that one device. If it checks in again later, it comes back when there is a free seat.
Approve (SendReady). A user’s next device only gets access to the password portal once you approve it. You then see “waiting for approval” with the Approve button. If several are waiting, Approve all approves them in one go. After approval, the computer picks up its access at the next contact.
New organisation password (SendReady). If a user who is not an organisation manager requests a new organisation password, a yellow block appears here with Approve and Reject. After approval, the new password applies to colleagues who still have to join; computers that are already connected notice nothing. If you do not recognise the request, reject it.
Remove. Remove a colleague who has left or a computer that has been replaced with Remove. The seat then becomes free. Note: if that user starts Fabreasy again afterwards, they register again as long as there is a free seat.
Reset all users. Removes all users and devices in one go, for example after a reorganisation. To confirm, you type in the licence key. Everyone then registers again the next time they start Fabreasy; that happens automatically.
Departments
With departments and managers you decide who sees which customers in SendReady, and who may add e-mail addresses. Only a manager adds an address for the department or the whole organisation; an ordinary member does not. This tab only appears if your licence includes SendReady and there is at least one user.
The customer addresses themselves are not in the portal. A manager manages them in SendReady; the portal only handles people and rights.
The table. Each user has a row, each department a column. For each department you choose:
| Choice | What the user gets in SendReady |
|---|---|
| – | nothing from this department |
| Member | automatically all customers of the department, with name, company and password |
| Manager | that, plus adding or removing customers of the department |
The Organisation managers column comes first. An organisation manager manages all departments and the customers of the whole organisation. A user can be in several departments. After making changes, click Save departments and managers. Users see the change the next time they start SendReady.
Who may add which addresses? In SendReady every customer address belongs to one layer. Who sees the address and who may add, change or remove it depends on that layer:
| Layer in SendReady | Who sees the address | Who may add, change or remove it |
|---|---|---|
| Only me | only the user who added it | every user, for themselves |
| Department | the members and managers of that department | the manager of that department and the organisation managers |
| Whole organisation | everyone on the licence | only the organisation managers |
Example with the table above: eelco is an organisation manager and may add addresses for the whole organisation and for every department. If you set Mireille to Member for “sales”, Mireille sees all customers of sales but cannot add any. For that, choose Manager.
As long as not a single manager has been ticked on the whole licence, everyone may add addresses in every layer. That is handy for a one-person business. As soon as you tick one manager, the rules in the table apply to everyone.
In the table every user takes up two lines: the display name on top, the Windows username below.
Adding a department. Under Departments, type a name at New department and click Add. If the name already exists, nothing is added and you see a message.
Removing a department. Click Remove behind the department. Its customers become customers of the whole organisation, so no address is lost. Its members simply remain users.
Messages on this tab:
- No managers appointed yet. Every user may then add and remove customers in every layer. Appoint managers to restrict that.
- There is no organisation manager. There are department managers, but nobody may add or remove customers of the whole organisation. Tick an organisation manager.
Agreement on documents
The customer portal has no tab for responses to documents. Since SendReady 3.0.105 the customer e-mails a response directly from their own mailbox to your office’s agreement address; Fabreasy receives none of it. You follow the responses in SendReady, Confirmations window, and they are kept in your office’s agreements folder. How that works: Agreement by e-mail.
If a customer still opens a link from an older e-mail, from when Confirm ran via the server, they see a short explanation that responding that way is no longer possible.
A response is a working arrangement with your customer: which version, which choice and when. It is not a signature and not a formal approval. If you need a signature, use a signature on paper or a qualified electronic signature.
Add or renew
Here you buy extras or renew, at the price that applies to your licence. Every amount is shown excluding and including VAT. If VAT is reverse-charged or you are outside the EU, it says “no VAT”.
| Line | What you buy | How the amount is calculated |
|---|---|---|
| Add SendReady | signing, the e-mail route and address recognition, for the number of users you enter; with the Confirm tick also agreement by e-mail and the password portal | the difference between SendReady and PDF Creator per user (plus Confirm) × the number, pro rata until your licence’s end date |
| More SendReady users | turns PDF Creator users into SendReady users, if you already have SendReady | as above |
| Add Confirm | agreement by e-mail and the password portal, for all SendReady users | price for Confirm × the number of SendReady users, pro rata until the end date |
| Extra users | more people with the same key, as PDF Creator or as SendReady | enter the number (1 to 500) and choose what they get; the amount is calculated as you type, pro rata until the end date |
| Renew | a new year | price per user × the number of users you enter |
You only see Add SendReady if you do not have SendReady yet; after that the line is called More SendReady users. If a SendReady trial is running, this purchase converts the trial; everything from the trial stays in place. You see Add Confirm if you have SendReady without Confirm.
Renew is possible from thirty days before the end date. Before then it shows the date from which you can renew. Waiting costs you no days: a renewal always runs on from your current end date, and the new date is shown. If the licence has already expired, the new year counts from today.
The renewal amount follows your licence: PDF Creator users, SendReady users and Confirm, each at their own price. When renewing you also choose the number of users for the new year. More or fewer is possible, and it takes effect right after payment. Fewer than the number currently in use is only possible after you first remove users on the Users tab.
If a returning-customer discount applies, you see the old price struck through, the percentage and until when the discount applies.
Continue to payment opens the payment page in a new tab. After payment the change takes effect immediately and the invoice appears on the Invoices tab.
Invoices
Here you download your invoices and set the details that go on the next invoice.
Your invoices. For each invoice you see the number, the date, the description and the amount including VAT. Click pdf to download it. If there are no invoices yet, it says so.
Billing details. Enter what should be on your invoice and click Save:
- Company name
- Contact person
- Address (several lines)
The details apply to the next invoice. Invoices that have already been sent stay as they were. The company name and contact person also appear as licence holder on the Licence tab.
Managers
Besides the owner of the licence, others can manage the portal, for example the accounts department. The owner (the e-mail address the licence is registered to) always keeps access.
Adding someone
- Enter the e-mail address at Add a new manager and click Invite.
- The new manager receives an e-mail with a confirmation link. It is valid for 24 hours.
- The new manager opens the link and clicks Confirm and sign in, and is then signed in straight away.
Until that confirmation the status is “Awaiting confirmation” and that address cannot sign in. If the link has expired, invite the same address again. After that, a manager signs in the same way as the owner: with a login link by e-mail.
Removing someone. Click Remove behind the address. You cannot remove the owner here.
Every confirmed manager can do everything the owner can do in the portal: remove users, buy extras and renew, download invoices, and add or remove other managers. So only invite people who are allowed to do that.
Logging out and frequently asked questions
Click Log out to the right of the tabs when you are done, especially on a shared computer or a terminal server. Otherwise the next user of that computer can see your licence key, users and invoices for up to 2 hours.
I do not get a login link. Check your Junk Email folder. Use the address the licence is registered to, or the address of a confirmed manager. A link is valid for 30 minutes; otherwise request a new one.
The link says “expired or has already been used”, but I have only just opened it. Then it was older than 30 minutes or had already been used. Request a new one and click Sign in on the page.
A colleague has left. Remove them on the Users tab. The seat becomes free immediately.
A new colleague cannot use Fabreasy. Probably all seats are taken. Remove someone who is no longer there, or buy extra users under Add or renew.
A staff member has a new laptop. The new device registers automatically. With SendReady you first approve it on the Users tab. The old device drops off automatically after 30 days, or you remove it with ×.
Someone only wants to see which documents have been agreed. That is not in the portal but in SendReady, Confirmations window, on every computer with the same agreements folder. Do not make anyone a manager of the portal for that.
My licence does not renew by itself. That is correct, unless you chose automatic renewal. You receive a reminder 30 days and again 7 days beforehand and renew under Add or renew.
Administration
Licence and workstations
A Fabreasy licence is a key that starts with FBR-. The licence applies per user: per person with their own Windows account, not per computer.
Entering a licence key
- In the Dashboard, click Enter licence…, or open Setup, License tab, and click Buy or enter a license.
- Click Enter license and paste the key into the field, or click Paste from clipboard. Fabreasy removes spaces and line breaks itself.
- Click Apply License.
You see Valid license found and activated! and then the licence details: end date, company, administrators and whether SendReady is included. You need internet to enter the key.
Do you still have a key from an older version of Fabreasy? You may enter that too; Fabreasy exchanges it for a new one.
Users and computers
| Rule | Explanation |
|---|---|
| One seat per user | Every Windows user who uses Fabreasy counts as one user. A colleague is a separate user |
| Two computers included | The same user may work on two computers, for example at the office and on a laptop |
| More computers | A user’s third and fourth computer together cost one extra seat |
| Terminal server | On a terminal server each user counts as one computer, also across several servers |
| Unused computer | A computer that has not been used for 30 days no longer counts |
A user keeps occupying a seat, even without computers, until the administrator removes the user in the Fabreasy Portal, or until Fabreasy has been uninstalled, with an internet connection, from that user’s last computer.
If all seats are in use, NO LICENSES LEFT appears when you enter the key. The administrator can then free a seat or extend the licence in the Fabreasy Portal.
Requesting a licence from your administrator
You do not have a key yourself, but someone in your organisation takes care of the licence? Then request a seat:
- When entering the licence, click No key? Ask your administrator.
- Enter the administrator’s e-mail address and click Send request. You see how the administrator sees your request: the name of the computer and your user name.
- The administrator gets an e-mail and approves the request in the Fabreasy Portal, Users tab.
- As soon as that has happened, Fabreasy works automatically. The window does not need to stay open; with Check now you check straight away.
You always get the message that the request has been sent, even if the address does not belong to a licence. If nothing happens, check the address with your administrator and choose Different address. A request that has not been approved within 14 days expires.
Rolling out in an organisation (for IT)
An administrator can activate Fabreasy on all PCs at once, without users having to do anything:
| Way | How |
|---|---|
| Silent installation with key | setup.exe /VERYSILENT /LICENSEKEY=FBR-…: every Windows user becomes active on first start |
| Silent installation with request | setup.exe /VERYSILENT /ADMINEMAIL=it@yourcompany.com: on first start every user requests a seat from that address |
| Group policy or Intune | Registry value LicenseKey or AdminEmail (string) under HKLM\SOFTWARE\Policies\Fabreasy\PDF Creator |
| Passing on settings | setup.exe /VERYSILENT /IMPORT="\\server\share\Standard.exp": the settings, letterhead and signatures of a model PC |
With a silent installation the installer does not close Word and Excel; make sure they are closed.
SendReady on the same licence
A licence can have users with and without SendReady. If your licence still has a free SendReady seat, you can take it yourself via Take a SendReady seat in the Dashboard. If they are all taken, ask your administrator. Confirm is turned on by the administrator for the whole licence: it then applies to everyone with SendReady. See Three versions.
Without internet
Fabreasy checks the licence in the background. If there is briefly no connection, a paid licence simply keeps working:
- up to 30 days after the end date of the licence;
- for a licence without an end date, up to one year after the last successful check.
As that limit approaches, you get a message once a day. Once the limit has been reached, making PDFs stops until the PC has a connection to pdfcreator.fabreasy.com again; after that everything works again straight away.
Another PC, or a colleague leaves
| Situation | What you do |
|---|---|
| An extra PC for yourself | Install Fabreasy and enter the same key |
| A new PC to replace the old one | Install Fabreasy on the new PC and enter the key. Uninstall Fabreasy from the old PC while it has internet, or have the administrator remove the old computer in the portal. Otherwise the old PC stops counting after 30 days |
| A colleague leaves | The administrator removes the user in the Fabreasy Portal, Users tab |
You manage the licence, the users and the invoices in the Fabreasy Portal. That is described in Reference: all options of the Fabreasy Portal.
Updating to a new version
Fabreasy checks every day whether there is a new version, but does not install anything automatically. In Setup, About tab, and at the bottom of the Dashboard, the newest version then appears next to the installed version. The How to update button opens the page with the newest version.
- Download the installer, the same one you used before (Creator or SendReady).
- Run it as administrator and choose Yes at the question about the existing installation.
- The old version is removed and the new one installed. Your licence, settings, letterhead and signatures stay as they are.
Uninstalling and reinstalling Fabreasy
Uninstall Fabreasy via Windows Settings > Apps. If the PC has internet, Fabreasy signs this computer off; if it was the user’s last computer, the seat becomes free. The program asks whether you want to keep your data (Do you want to KEEP all Fabreasy user data?). With Yes your settings, letterhead and signatures stay.
Fabreasy keeps your licence key safely on the PC, encrypted for your Windows account. If you reinstall Fabreasy later, the licence becomes active again automatically; you do not need to look up the key.
Administration
Taking your settings to another PC
With an export file you take a whole installation with you: all settings, all letterhead sets, the letterhead, the signatures and the licence. Useful for a new PC, to let a new colleague start with the same setup, or as a safe first step before you reset the settings because of a problem (see Troubleshooting).
Do you only want to give one or more sets to a colleague? Then use Share… in Letterhead sets: that adds sets and leaves the rest as it is. See Sharing sets and the company folder.
Sharing (.fabset) | Exporting (.exp) | |
|---|---|---|
| What is included | The chosen sets with their letterhead and e-mail message | All settings, sets, letterhead, signatures and the licence |
| On the receiving PC | Sets are added; per set you choose what happens | All settings and sets are replaced |
| Where | Letterhead sets, Share… and Import… | Setup, About tab |
Exporting
- Open Setup, About tab.
- Leave Include letterhead switched on if the letterhead should be included.
- Click Export settings and choose a name and location. By default that is
Fabreasy_<username>.expin Documents.
Importing
- Close SendReady if it is open.
- Open Setup, About tab, and click Import settings.
- Read the warning: importing replaces all settings and letterhead sets on this PC. Click Yes to continue.
- Choose the
.expfile.
Fabreasy first makes a backup of the current settings and tells you where it is. After the import, Setup closes. The licence from the file is activated on this PC as a separate seat for this user.
If you choose a .fabset file under Import settings, Fabreasy opens Letterhead sets and the sets are added instead of replaced.
What is not included
- Passwords of sets. After the import you see for which sets you need to enter the password again; see Security per set.
- Fixed passwords per recipient in SendReady. The addresses go along, but their passwords can only be read on the old PC. How to take them along is described below.
- Statistics, window positions and the progress of Get started.
A support file (see Troubleshooting) is not an export file and cannot be imported.
Taking SendReady addresses and passwords along
A fixed password per recipient is encrypted for your Windows user on this PC. That is why it does not go into an export: an export file often travels by e-mail. Take the passwords along with the SendReady backup:
- On the old PC, open SendReady, Email addresses, and click Backup….
- Choose a folder outside the PC, for example OneDrive or a network folder, and click Turn on. Keep the backup password safe, for example with Save card (pdf)…. SendReady then updates the copy itself after every change.
- On the new PC, open SendReady, Email addresses, Backup…, and choose Restore from an existing backup…. Choose the file and enter the backup password.
Turn the backup on as soon as you use fixed passwords, not only when you get a new PC: a broken PC gives no warning. As long as there is no copy, SendReady shows an orange line under Email addresses.
If your office works with the password portal, the new PC fetches the passwords from the portal as soon as you enter the organisation password there. Fabreasy does not know the backup password or the organisation password: keep them yourself.
Help
Troubleshooting
Is something not working as you expect? Start with the five checks below: they usually solve it. If they do not help, follow the steps back to the defaults. After that, per topic, you find the messages you may come across, with what to do about them.
Check this first
- Is adding letterhead switched off? This is by far the most common cause when it seems as if Fabreasy no longer works: the PDF is made, but without letterhead. Add letterhead is one switch for Drag & Drop, the printer toolbar and the ribbon in Word and Excel. A click on the letterhead button switches it off, even if that happened by accident. You recognise it like this:
- Drag & Drop shows a red line Letterhead is OFF. Click Switch back on.
- In the printer toolbar and in the ribbon, the letterhead button is grey instead of in colour. Hold the mouse over it: you see Add letterhead = OFF. Click the button to switch letterhead back on. In the ribbon there is also the Attention group on the right.
- After a PDF has been made, the Windows notification Letterhead is OFF: this PDF was made without letterhead. appears.
- Has the right set been chosen? Look at Use letterhead set in Drag & Drop, in the printer toolbar or in the ribbon. Open the set in Letterhead sets and check that it has a layer, that this layer is not set to Off (do not apply), and that no sheet shows file missing!.
- No toolbar or no PDF after printing? Open Setup, About tab, and click Repair settings. That restores the link between the printer and Fabreasy.
- Do you have the newest version? In Setup, About tab, you see which version is installed and whether there is a newer one. How to update is explained in Licence and workstations.
- Restart the program, and if that does not help, the PC. If it concerns Word or Excel, close all Word or Excel windows and open them again.
Step by step back to the defaults
Is the problem vague, or does it keep coming back? Then find out whether it is caused by your settings. Do the steps in this order and stop as soon as the problem has gone.
- Make a support file. Open Setup, About tab, and click the button with Fabreasy’s e-mail address. The zip file goes into Documents; you do not need to send the e-mail yet. Do this first: it records your settings as they were when the problem occurred.
- Make an export. In Setup, About tab, leave Include letterhead switched on and click Export settings. Remember where the
.expfile is. Passwords are not included in an export. - Restore the basic settings (the light step). In Setup, About tab, click Reset all settings. All settings go back to the defaults. Your licence, letterhead sets, signatures and the addresses in SendReady with their passwords stay as they are. Setup then closes. Try again; if the problem has gone, you are done.
- Still not solved? Do a full reset. In Setup, About tab, click Reset application. All settings, letterhead sets, signatures and signature sets go back to the factory settings. Your licence and the addresses in SendReady with their passwords are kept. Fabreasy first makes an export in Documents, folder
Fabreasy\Reservekopie, and tells you where it is. Setup then closes. - Try with the default settings. In Drag & Drop, make a PDF with Try the sample letter, or with the same document the problem occurred with. The PDF now gets Fabreasy’s sample letterhead, not yours; that is as it should be.
- Restore your export. In Setup, About tab, click Import settings and choose your export from step 2, or the one from the full reset. Then enter the passwords of your sets again. Do this also if the problem was still there after step 5.
- Was the problem still there in step 5? Then it is not caused by your settings. Send the support file from step 1 (see “Help from Fabreasy” at the bottom) and describe what you did and what you saw.
- Did it only come back after importing? Then it is in a setting or a set. Send a new support file and mention that it came back after importing.
More about exporting and importing is in Taking your settings to another PC.
When installing
| What you see | What you do |
|---|---|
| The installer says that Word or Excel is still running | Choose Yes to have them closed (unsaved work is lost), or close them yourself and choose No. Word and Excel can be open invisibly, for example because of Outlook |
| “.NET Framework 4.8 was not found” | Install .NET Framework 4.8 from microsoft.com and run the installer again |
| “The Windows Print Spooler service is not running” | Fabreasy has been installed, but without the printer. Start the Print Spooler service or restart Windows, and install again |
| “The Microsoft VSTO runtime was not found” | The tab in Word and Excel is missing. Install Visual Studio 2010 Tools for Office Runtime from microsoft.com |
| The Fabreasy PDF Creator tab is missing in Word or Excel | Office may have disabled the add-in after an error. Reinstall Fabreasy: the installer switches it back on |
| A message that the program has been changed or does not come from Fabreasy | A Fabreasy file is damaged or has been replaced. Reinstall Fabreasy from the website |
When making a PDF
| What you see | What you do |
|---|---|
| Drag & Drop opens the report with FAILED | The report says for each file what went wrong |
| “Failed to convert” for a Word or Excel file | Word or Excel could not open or save the file. Try opening it yourself in Word or Excel. If Fabreasy says that Office is damaged: Windows Settings > Apps > Installed apps > Microsoft Office > Modify > Quick Repair |
| “No Microsoft Office detected” | Word, Excel and PowerPoint files need Microsoft Office. PDFs and images do work |
| “The letterhead could not be read. No PDF was created.” | Open the set in Letterhead sets. If a sheet shows file missing!, choose the sheet again |
| The PDF has no letterhead | Add letterhead is switched off; see “Check this first” at the top |
| The letterhead disappears behind the text | The PDF has a white area over the page. In the set, switch on Remove a white area in the document |
| “The document was not created: a password is set for …, but it is not known on this PC” | Enter the password in the set, Advanced options. See Security per set |
| A signature tag stays in the PDF as text | The tag does not exist, is misspelt or is switched off in the chosen signature set. Use Check first in Signatures |
| An automatic signing rule does nothing | Capitals count, the text must be on one line and the rule must be ticked in the chosen signature set |
| Not signed: no card or token found | Insert the card and choose Search again. See Digital signing |
| Not signed: the timestamp server did not respond | Check the internet connection and try again later |
In Getting started
| What you see | What you do |
|---|---|
| The tick after a step does not appear | The tick comes with the result, not with opening the program. For a signature, for example, only when your first PDF with a signature is ready. Finish the step |
| “The sample letter could not be created.” | Go through the checks under “Check this first”. If it still does not work after that, send a support file |
| “Smart sending is part of SendReady, and that is not in your licence. The trial has already been used on this PC.” | The SendReady trial can be used once per PC. The licence holder can add SendReady in the Fabreasy Portal |
| “Sending with approval is not on your licence.” | The licence holder can add it in the Fabreasy Portal, under Extend or renew |
| The Get started card has gone | Click Getting started… at the bottom of the Dashboard |
With the licence
| What you see | What you do |
|---|---|
| “NO LICENSES LEFT” | All seats are in use. The administrator frees a seat or extends the licence in the Fabreasy Portal |
| “Connection to the server is required…” | Entering a key needs internet. Try again later; the trial keeps running in the meantime |
| The request to the administrator keeps waiting | Check the e-mail address with your administrator and choose Different address. The administrator approves in the Fabreasy Portal, Users tab |
| “Evaluation period expired” | The 14-day trial is over. Enter a licence key or request a seat from your administrator |
| “Fabreasy has not been able to check your licence since …” | Make sure the PC can reach pdfcreator.fabreasy.com |
| The licence window appears with a paid licence | The licence has expired, or your user or computer has been removed from the licence. Ask your administrator |
| A message that this version may no longer process documents | Update to the newest version; see Licence and workstations |
With settings
| What you see | What you do |
|---|---|
| Importing refuses: “Close SendReady and import again” | Close SendReady and import again |
| After an import: “Passwords are not included in an export” | Enter the passwords again for the sets mentioned, under Advanced options |
| After an import: “The licence could not be registered” | Enter the key on the License tab in Setup |
Help from Fabreasy
The manual. The Help button in the Dashboard and the question mark in the programs open this manual, at the part about that screen.
Sending a support file. Open Setup, About tab, and click the button with Fabreasy’s e-mail address. Fabreasy makes a zip file in Documents and opens a new e-mail with that file as an attachment. If attaching does not work, File Explorer shows the file; then drag it into the e-mail yourself. The support file contains your settings and log files, without passwords, licence key, e-mail addresses or document names.
Sending a print along. If it concerns a print that does not come out right, support may ask you to switch on Keep my prints for support (7 days) in Setup, About tab. Then print the document again and send the support file. After 7 days the tick box switches off automatically and the kept prints are deleted.
An unexpected error. If you get an error window, click Send to Fabreasy. That only sends the technical error message and the version, no documents, names or e-mail addresses. You get a reference; mention it when you contact us.
Glossary
Glossary
PDF Creator
| Term | Meaning |
|---|---|
| Add letterhead | The switch that turns letterhead on or off, for Drag & Drop, the printer toolbar and the ribbon at the same time. If it is off, a PDF gets no letterhead |
| Back cover | One or more pages that come after the document, for example general terms and conditions |
| Certificate | A digital key in your name, on a smart card or USB token with a PIN; needed for digital signing |
| Company folder | A shared folder with the organisation’s letterhead and sets; every PC that follows it takes over new versions automatically |
| Continuation paper | Letterhead for page 2 onwards; in a set, a second layer with Page 2 to end |
| Dashboard | Fabreasy’s start screen, with all the programs and Get started |
| Default set | The letterhead set Fabreasy uses if you do not choose another one; it is always at the top of the list |
| Digital signing | A cryptographic signature with your certificate and a timestamp in the PDF; the recipient sees who signed and whether the document has been changed since |
| Drag & Drop | The window in which you drag files onto a box to make a PDF of them |
Export file (.exp) | A file with all the settings, sets and the licence of an installation; importing replaces everything on the other PC |
| Fixed position | A signature in a fixed position on the page, with a page choice |
| Front cover | One or more pages that come before the document |
| Layer | One sheet of letterhead in a set, with a choice of which pages it applies to |
| Letterhead | A one-page PDF with your logo and address, placed under (or over) the pages of the document |
| Library | All the letterhead files Fabreasy knows on this PC |
| Magic Wand | The button that combines saving, e-mailing and printing as you set in Setup |
| PDF/A | A PDF format for archiving; you make it in PDFixer |
| PDFixer | The program for editing an existing PDF: arranging pages, text, signature, PDF/A |
| Printer toolbar | The window that appears after you have printed to the Fabreasy printer |
| Ribbon | The Fabreasy PDF Creator tab in Word and Excel |
| Route | A goal in Get started, such as My PDFs with letterhead, with the steps that belong to it |
| Seat | The right of one user to use Fabreasy, on two computers |
| SendReady | Fabreasy SendReady, the extension of PDF Creator: prepares an email from the document itself, with a fixed password per recipient, and signs digitally; see Three versions |
| SendReady & Confirm | Fabreasy SendReady & Confirm, the extension of SendReady: sending confidentially (the recipient chooses the password) and sending with approval, for all SendReady users on the licence |
Set file (.fabset) | A file with one or more letterhead sets for sharing; importing it adds sets |
| Setup | The program with Fabreasy’s settings, the licence, export and import and the support file |
| Signature | An image (PNG with a transparent background) of your signature or initial |
| Signature set | A named choice of fixed positions, signing rules and tags that take part when a PDF is made |
| Signing rule | A rule for automatic signing: if this text is in the document, this signature is added |
| Suffix | The addition to the file name when you process a PDF, by default _Output |
| Support file | A zip file with your settings and log files for support, without passwords, licence key or document names |
| Tag | A code such as >#>Jan-25% in a document; the signature goes there |
| Timestamp | A point in time, recorded by a timestamp server, in a digital signature |
| Tour | A short exercise with the sample letter, in which an explanation window shows where to click; started via Get started in the Dashboard |
| White area | A white rectangle in a PDF that covers the letterhead; Fabreasy can remove it |
SendReady, agreement by e-mail and the portal
The words used in this manual, with where you come across them. “Customer” always means the person who receives your document.
| Term | What it is | Where you come across it |
|---|---|---|
| Agreement address | Your office’s e-mail address to which the customer e-mails with the buttons, preferably a shared mailbox | SendReady, Confirmations, Settings… |
| Agreement by e-mail | The request for agreement: three buttons on the last page of the PDF. A click prepares an e-mail to your office for the customer, which the customer sends themselves. Fabreasy is not in between and receives nothing. Whoever can open the document with the password can respond; it does not say who clicked. If a document needs to be signed, this is not the way to do it. It is not a trust service within the meaning of the eIDAS Regulation | The document to the customer; SendReady, Confirmations window |
| Agreement page | Page in the browser where the customer opens the document with the password and gives a remark that only your office can read. The remark is encrypted in the browser and sent with the customer’s own e-mail program; the page sends nothing to Fabreasy | The address is on the last page of the document |
| Agreements folder | The folder where SendReady keeps, for each document sent with buttons, the sent document, the codes and every response e-mail; a shared folder for an office with several computers. Not to be confused with the case folder in which you keep a customer’s documents | SendReady, Confirmations, Settings… |
| Case folder | The folder in which your office keeps a customer’s documents | An office with several workstations |
| Code | Secret value behind each button, which is only in the encrypted part of the PDF. A response only counts if the e-mail contains the code of that button | The customer’s response e-mail; verzending.txt in the agreements folder |
| Confirm | The extension of SendReady with sending confidentially (the password portal) and agreement by e-mail. As a version it is called Fabreasy SendReady & Confirm; it applies to all SendReady users on the licence | Fabreasy Portal, Add or renew |
| Data processing agreement | The agreement between your office and Fabreasy about personal data in the password portal; agreement by e-mail is outside it, because nothing reaches Fabreasy | SendReady, at the start |
| Department | Group of staff with their own customer addresses | Fabreasy Portal, Departments tab |
| Device | A computer a user works on; two per user are included | Fabreasy Portal, Users tab |
| Emergency card | Printed sheet with the organisation password, to be kept in a fixed, safe place | SendReady, when creating the organisation key |
| Emergency reset | Last resort when no computer has the organisation key any more; after it, every customer chooses a password again | Via the licence holder and Fabreasy |
| Fabreasy Portal (also: customer portal) | The website where you manage your licence, users, departments and invoices | pdfcreator.fabreasy.com/my-license |
| Hash value | A value of 64 characters calculated from the file; it belongs to exactly one file, and if anything in the file changes, the value is different | SendReady, Confirmations window; verzending.txt; Check whether it is the same file… |
| Label | Short line in the document that says who it goes to, for example TO: with the address; the customer never sees it | The SendReady ribbon in Word |
| Letterhead set | The description of which letterhead, which covers, which protection, which e-mail message and which digital signing a document gets; in Confirmations you choose for each set whether buttons for agreement are added | Letterhead sets, Advanced options; SendReady, Confirmations, Settings… |
| Licence holder, owner | The company and e-mail address the licence is registered to | Fabreasy Portal, Licence tab |
| Manager (department) | Staff member who may add and remove a department’s customer addresses | Fabreasy Portal, Departments tab |
| Manager (portal) | Someone who may manage the Fabreasy Portal alongside the owner | Fabreasy Portal, Managers tab |
| Organisation key | The key with which your customers’ passwords are encrypted; every connected computer keeps it itself | SendReady, at the start on a new computer |
| Organisation manager | Staff member who manages the customer addresses of the whole organisation | Fabreasy Portal, Departments tab |
| Organisation password | The lock with which a new computer fetches the organisation key once; Fabreasy does not know it | The emergency card |
| Overview (CSV) | The sent documents in the Confirmations window as a file for Excel, one line per document sent, with hash value, status and remark | SendReady, Confirmations window, Export overview… |
| Password page | Page where the customer chooses a password for your PDFs | The invitation to the customer; below every protected e-mail |
| Summary | PDF per document sent in the agreements folder: status, reference, client, the timeline with times (and which clock each time comes from) and what each file in the folder is. SendReady recreates it at every event; the files next to it remain the source. It is your office’s own record; Fabreasy does not sign it | SendReady, Confirmations window, Open summary or double-click a line |
| Reference | Code of eight characters per document sent, for example FR:7KQ2M9XA, on the last page and in the subject of the response e-mail. A new version gets a new reference | The document; SendReady, Confirmations window |
| Replaced, lapsed | Replaced: a newer version has been sent. Lapsed: you marked the document sent as no longer needed | SendReady, Confirmations window |
| Response | The e-mail the customer sends with a button: agreed, not yet agreed with a remark, or do not proceed. It goes from the customer’s mailbox to your agreement address, and SendReady records it in the agreements folder | Your mailbox; SendReady, Confirmations window |
| Response page | The last page of the document, with the document name, the reference and the three buttons | The document to the customer |
| To check | Status of a document sent that received a response that is not right: no valid code, a different address, or after Lapsed | SendReady, Confirmations window |
| User, seat | A staff member with their own Windows account; the number is set in your licence | Fabreasy Portal, Users tab |